
Streamlit, an open source Python library, has made it significantly easier to create and deploy interactive data applications, particularly for data science and machine learning workflows. It offers an intuitive, no-code/low-code interface that allows users to build custom web applications without needing front-end development expertise. Snowflake acquired Streamlit in March 2022, integrating it natively into their platform, enabling users to create interactive applications directly within Snowflake. Due to this integration, users can now leverage Snowflake’s powerful data processing and storage capabilities, simplifying the creation of dynamic, user-friendly applications for data visualization, dashboard creation, chat application creation and more.
In this article, we’ll cover everything you need to know about Streamlit in Snowflake, including what it is, its key features and how it makes creating data applications easier. Then we’ll zoom in on the specifics of the Snowflake Streamlit integration, covering what sets this combination apart and its pros/cons.
What is Streamlit?
Streamlit is an open source Python framework under the Apache 2.0 license. It turns Python scripts into interactive web apps. It is built for data scientists and engineers who know Python well but do not want to learn React or Django just to share a chart.

Streamlit’s philosophy is simple yet powerful: write Python top-to-bottom, and Streamlit handles the web layer. Each time a user interacts with a widget, the script re-runs from top to bottom, and the UI updates. It’s not the right model for every kind of app, but for data tools it’s a solid default.
Watch this video by The Data Doctor for a basic overview of Streamlit and how to use it inside Snowflake.
Key features and benefits of Streamlit
1) Simplicity, User friendly and Ease of Use
Streamlit allows developers to create applications with minimal coding, using straightforward APIs that resemble standard Python syntax.
2) Interactive Widgets
Streamlit Python library offers a variety of interactive components such as sliders, buttons and text inputs, enabling users to engage with data dynamically.
3) Rapid Updates
Streamlit’s “hot-reloading” feature allows you to see changes in your app in real time as you code, making the development process faster and more iterative.
3) Integration with a Wide Range of Libraries
Streamlit offers a variety of built-in components for data visualization, including support for popular libraries like Matplotlib, Plotly, Pandas, NumPy and Altair.
4) Easy Deployment
Streamlit applications can be easily deployed on various platforms, including local servers and cloud services.
5) Live Code Editing
Users can see the results of their code changes in real time, accelerating the development process through rapid prototyping.
6) State Management
Streamlit provides mechanisms to preserve user interactions across sessions using session state management features.
7) Extensive Customization
Users can freely customize the look and feel of their applications with themes and layout options.
Benefits of using Streamlit
1) Open Source Nature
Streamlit is an open source (under Apache-2.0 license) Python library that gives users the opportunity to modify and extend the library, providing versatility and adaptation for a variety of task types.
2) Rapid Prototyping
Streamlit enables quick transformation of data scripts into functional web applications, making it ideal for testing ideas or showcasing models without extensive web development knowledge.
3) Focus on Data Science
Streamlit removes the difficulties of front-end/web development, allowing data scientists to focus solely on their analysis and visualizations.
4) Community Support
Streamlit has a thriving community that drives a robust ecosystem of components, plugins and extensions.
5) Cross-Platform Compatibility
Streamlit can be installed on Windows, macOS, or Linux. You can install Streamlit using the command line in your terminal.
How Streamlit Simplifies the Data App Creation Process?
Traditional libraries and frameworks need a lot of development time. You have to combine front-end and back-end development, which can be a challenge. Streamlit simplifies things by letting developers focus just on Python code. Other tools like Tableau and Power BI can do similar things and Jupyter Notebooks, Dash and Shiny are also options. But Streamlit is unique—it’s simple and works well with the Python data science ecosystem.
Streamlit in Snowflake—native integration
Snowflake acquired Streamlit on March 2, 2022, for approximately $800 million. The goal was direct and clear: let Snowflake users build and share data applications without moving data out of Snowflake environment, without managing separate infrastructure, and without writing a single line of code.
The integration runs Streamlit as a native Snowflake object. Your app code lives in a Snowflake stage, executes Snowflake compute and connects to Snowflake data through an active session. No connection strings, no credentials to manage.
Differences between Streamlit in Snowflake and standalone Streamlit
Streamlit in Snowflake preserves the essential features and usability that made standalone Streamlit so well-liked, but there are some significant variations:
| Standalone Streamlit | Streamlit in Snowflake | |
| Hosting | You manage it | Snowflake manages it |
| Data access | Configure connections explicitly | Active session by default |
| Security | Your responsibility | Inherits Snowflake RBAC |
| Python packages | Any pip package | Snowflake Anaconda Channel (warehouse runtime) or PyPI (container runtime) |
| Deployment | Manual | One-click via Snowsight |
| Scalability | You provision compute | Snowflake scales compute |
Key Features of Streamlit in Snowflake
1) Compute and storage managed by Snowflake
One of the biggest benefits of using Streamlit in Snowflake is that Snowflake handles all the compute and storage stuff behind the scenes. This means:
For one, it’s super easy to scale up when you need it. As your data grows or your app needs more compute power, Snowflake automatically ups the resources to match the demand.
You also don’t have to deal with the hassle of setting up and maintaining separate servers or databases for your Streamlit applications. Snowflake’s got that covered.
And, with Snowflake’s architecture, your applications can process and analyze huge amounts of data without a hitch.
2) Role-based access control (RBAC)
Streamlit in Snowflake taps into Snowflake’s solid Role Based Access Control (RBAC) system. This gives you top-notch security for your applications and data:
You can set fine-grained permissions. Control who can create, edit, view and interact with Streamlit applications at a really detailed level.
Streamlit applications follow the same security rules as your Snowflake data, which means they inherit the access controls and policies you’ve already set up.
User management gets a lot easier. You can manage who has access to applications through the same interface and process you use for data in Snowflake.
3) Running Streamlit applications on Snowflake warehouses
Streamlit in Snowflake uses virtual warehouses, which bring a number of perks.
For one thing, you can easily scale your compute power to match your app’s needs.
You’ll also get better cost control, thanks to Snowflake’s per-second billing and the option to auto-suspend when you’re not using your app.
Plus, running your app close to the data means it’ll perform better—especially when you’re working with big datasets.
4) Integration with Snowpark, UDFs and Stored Procedures
Streamlit and Snowflake work really well together. Here are a few features that make them a great team.
Snowpark Integration is a key part. You can use Snowpark with Streamlit to write complex data logic in Python.
Snowflake’s User-Defined Functions (UDFs) are also super useful. You can add custom logic to your Streamlit applications using UDFs.
And then there are Stored Procedures. They let you wrap up complex operations and use them in your Streamlit applications, making things a lot simpler.
5) Snowsight for real-time development
Snowflake’s Snowsight web interface includes a built-in Streamlit editor with:
- A code panel with auto-complete for Streamlit and Snowpark APIs
- A live app preview that updates as you run
- A file browser for multi-file apps
- A package picker backed by the Snowflake Anaconda Channel
- Git integration for syncing your app with a repository
Multi-page apps can now be created and edited directly in Snowsight. You don’t need SQL commands for that anymore.
6) Data Governance and Compliance Benefits
Streamlit applications can benefit from Snowflake’s robust data governance and compliance features by operating within the Snowflake ecosystem.
You’ve got data lineage, which helps track how data is used across different Streamlit applications and processes.
There’s also audit logging, which keeps detailed logs of who accessed what data and when, critical for staying compliant and secure.
Plus, you’ve got data encryption built right in, which keeps your data safe at rest and in transit.
And to top it off, you can take advantage of Snowflake’s compliance certifications, which cover a range of industry standards and regulations.
Streamlit in Snowflake is a breakthrough for organizations that require control over their data and infrastructure while creating data applications.
Next up, we’ll break down the process of building and deploying a Streamlit app in Snowflake, step by step.
Step-by-step guide to build and deploy interactive data applications using Streamlit in Snowflake
Now that we’ve covered the basics of Streamlit in Snowflake, let’s get hands-on and build some interactive data applications. This step-by-step walkthrough will take you from setting up your environment to sharing your app with others.
Prerequisites
Before we start, make sure you’ve got these prerequisites covered:
➤ Snowflake Account: You need an active Snowflake account with the necessary permissions to create and run Streamlit applications. If you don’t have one, you can sign up for a free trial on the Snowflake website.
➤ Access to Snowsight: Snowsight is Snowflake’s web interface where you’ll be creating and managing your Streamlit applications. Make sure you have access to it through your Snowflake account.
➤ Acknowledgement of External Offerings Terms: To use certain features and packages provided by Anaconda, you must acknowledge Snowflake’s External Offerings Terms.
➤ Network Configuration: Make sure that *.snowflake.app is allowlisted in your network. This is necessary for your Streamlit app to connect to Snowflake.
➤ SQL Knowledge: Basic familiarity with SQL is helpful, as you’ll be interacting with Snowflake data using SQL queries.
➤ Python Knowledge: A basic understanding of Python is essential, as Streamlit applications are written in Python.
➤ Supported Browsers: Make sure you’re using a supported browser. Snowflake supports all recent versions of Chrome, Firefox, Safari, Opera and Edge. Always check Snowflake’s documentation for the most up-to-date info on browser support.
➤ Necessary Privileges: You’ll need specific privileges in Snowflake to create and use Streamlit applications. We’ll cover these in detail in Step 2.
Step 1—Log in to your Snowflake account
Start by logging into your Snowflake account. If you’re using Snowflake’s web interface, you’ll be directed to the Snowsight dashboard upon login.

Step 2—Configure privileges to create and use Streamlit in Snowflake
Before you can create and use Streamlit applications, you need to ensure you have the correct privileges. Let’s break this down into two parts:
- Privileges required to create Streamlit applications
- Privileges required to view Streamlit applications
1) Privileges required to create Streamlit applications
To create and edit a Streamlit app using Streamlit in Snowflake, you must have a role with either the OWNERSHIP privilege on the schema where you want to create the app or all of the following privileges:
a) On the database that will contain the Streamlit app:
- USAGE
b) On the schema that will contain the Streamlit app:
- USAGE
- CREATE STREAMLIT
- CREATE STAGE
Here’s an example of how to grant these privileges using SQL commands:
GRANT USAGE ON DATABASE <your_database> TO ROLE <your_role>;
GRANT USAGE ON SCHEMA <your_database>.<your_schema> TO ROLE <your_role>;
GRANT CREATE STREAMLIT ON SCHEMA <your_database>.<your_schema> TO ROLE <your_role>;
GRANT CREATE STAGE ON SCHEMA <your_database>.<your_schema> TO ROLE <your_role>;2) Privileges required to view Streamlit applications
To view a Streamlit app, you need to have a Snowflake account and be signed in. Also, you must use a role that has been granted the USAGE privilege on:
- Database containing the Streamlit app
- Schema containing the Streamlit app
- Snowflake Warehouse used to run the Streamlit app
- Streamlit app itself
Here’s an example of how to grant these privileges:
GRANT USAGE ON DATABASE <your_database> TO ROLE <viewer_role>;
GRANT USAGE ON SCHEMA <your_database>.<your_schema> TO ROLE <viewer_role>;
GRANT USAGE ON WAREHOUSE <your_warehouse> TO ROLE <viewer_role>;
GRANT USAGE ON STREAMLIT <your_database>.<your_schema>.<your_app> TO ROLE <viewer_role>;Note that when an app owner shares a Streamlit app with another role, the USAGE privilege is typically granted automatically. But, if a Streamlit app is created in a schema with MANAGED ACCESS, you’ll need to manually grant the USAGE privilege.
Step 3—Enable Anaconda support
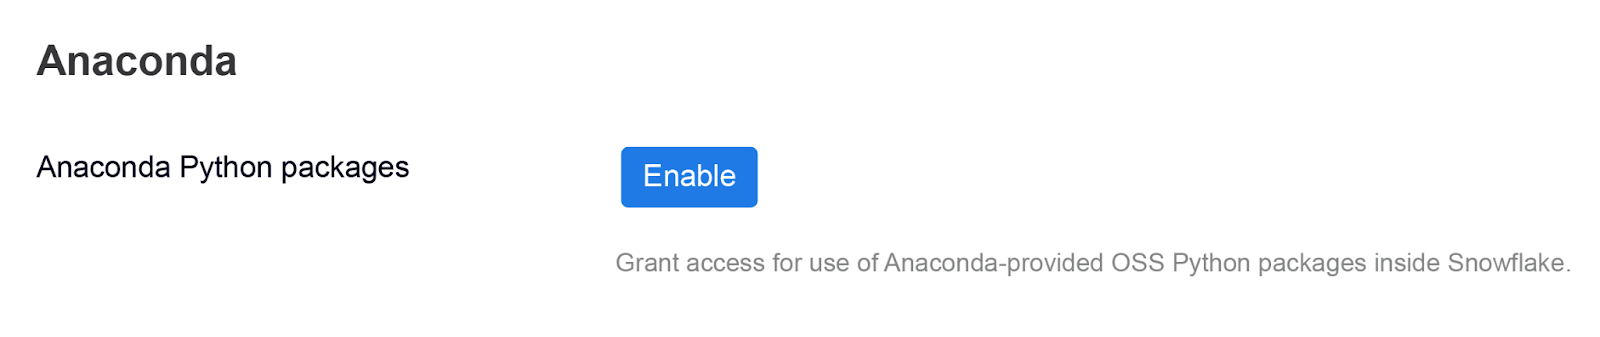
Streamlit in Snowflake uses packages from Anaconda, a popular distribution for data science and machine learning. To use these packages, you need to enable Anaconda support in your Snowflake account.
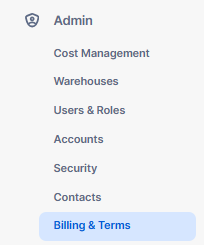
In Snowsight, navigate to “Admin” > “Billing & Terms“.
In the “Anaconda” section, click “Enable“.

Step 4—Set up Snowflake warehouse
Streamlit applications in Snowflake run on virtual warehouses. If you haven’t already set up a warehouse, you’ll need to do so by running the following command:
CREATE WAREHOUSE IF NOT EXISTS streamlit_warehouse
	 WITH WAREHOUSE_SIZE = 'XSMALL'
				MIN_CLUSTER_COUNT = 1
			 MAX_CLUSTER_COUNT = 1
			 AUTO_SUSPEND = 300
				AUTO_RESUME = TRUE
			 COMMENT = 'Snowflake Warehouse for Streamlit in Snowflake';

USE WAREHOUSE streamlit_warehouse;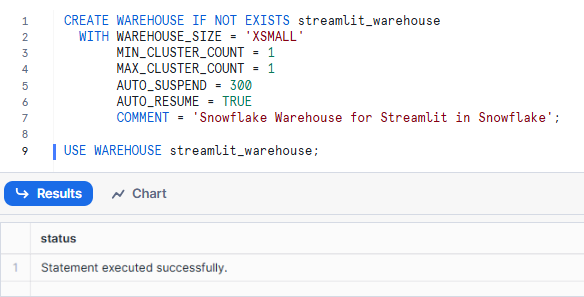
Step 5—Create a Database and Schema
If you don’t already have a Snowflake database and Snowflake schema for your Streamlit applications, you’ll need to create one:
CREATE DATABASE IF NOT EXISTS streamlit_database;

CREATE SCHEMA IF NOT EXISTS streamlit_database.streamlit_schema;

USE SCHEMA streamlit_database.streamlit_schema;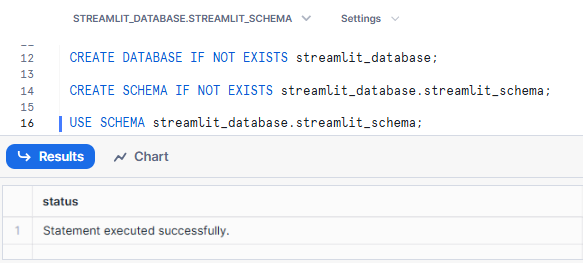
Step 6—Open Snowsight and launch Streamlit editor
Now that we have our environment set up, let’s create our first Streamlit app:
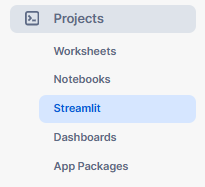
In Snowsight, navigate to “Projects” > “Streamlit“.
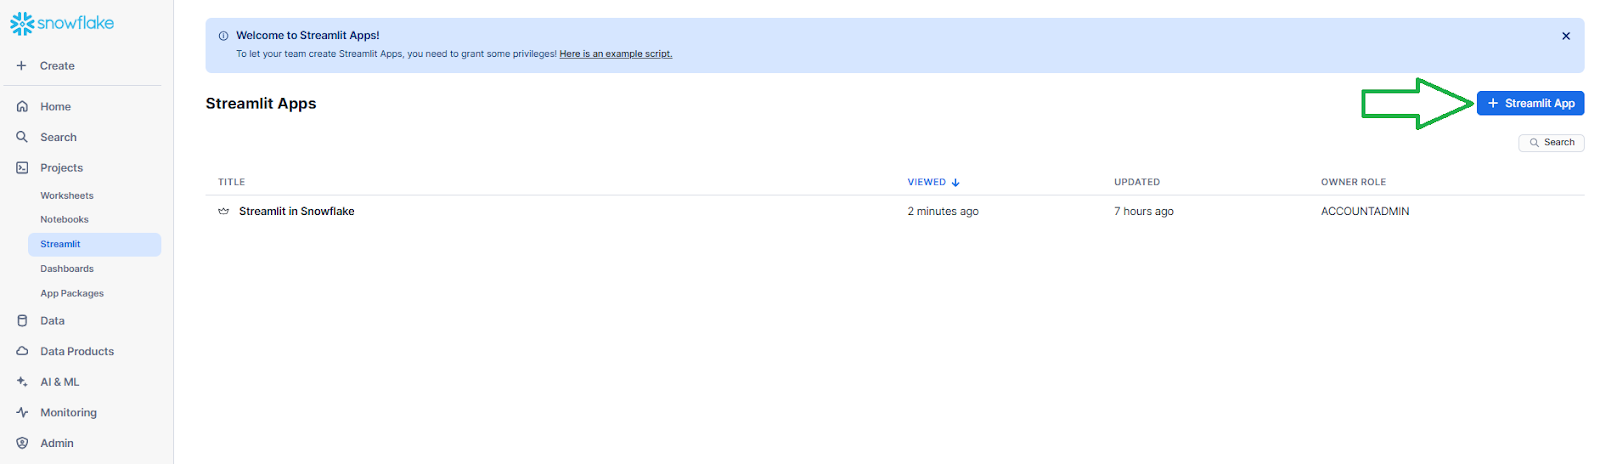
Click on “+ Streamlit App” to launch the Streamlit editor.
Step 7—Create your first Streamlit application
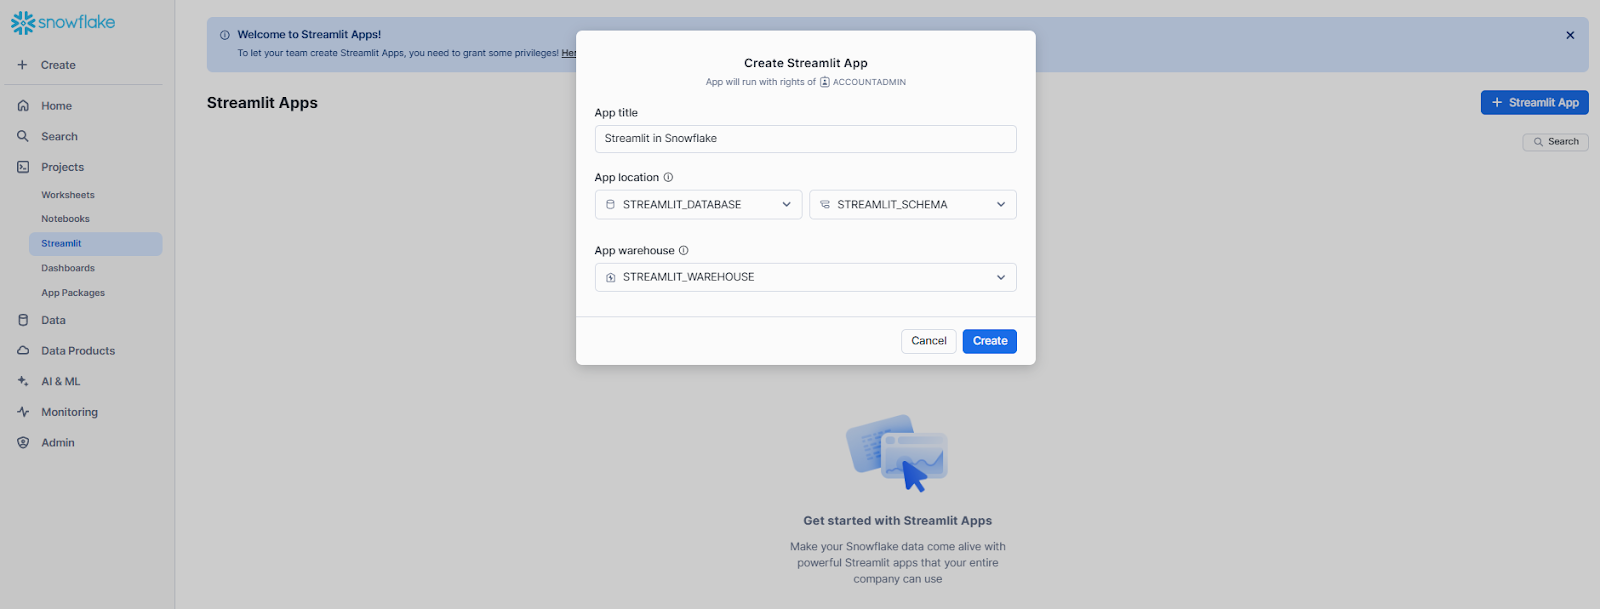
In the “Create Streamlit App” window, enter a title for your app. Next, pick the database and schema to create the app in. Ideally, this is the database you created a bit earlier (in Step 5). Now choose the warehouse that will actually run your app. It should be the one you set up earlier. Finally, click “Create“.
Step 8—Explore the Streamlit editor interface
Once your app is created, you’ll be taken to the Streamlit editor interface. Let’s take a moment to familiarize ourselves with its layout:
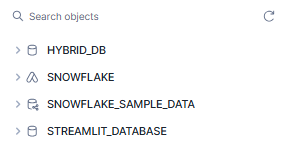
1) Object browser: On the left side, you’ll see a panel that allows you to browse databases, schemas and tables you have access to.
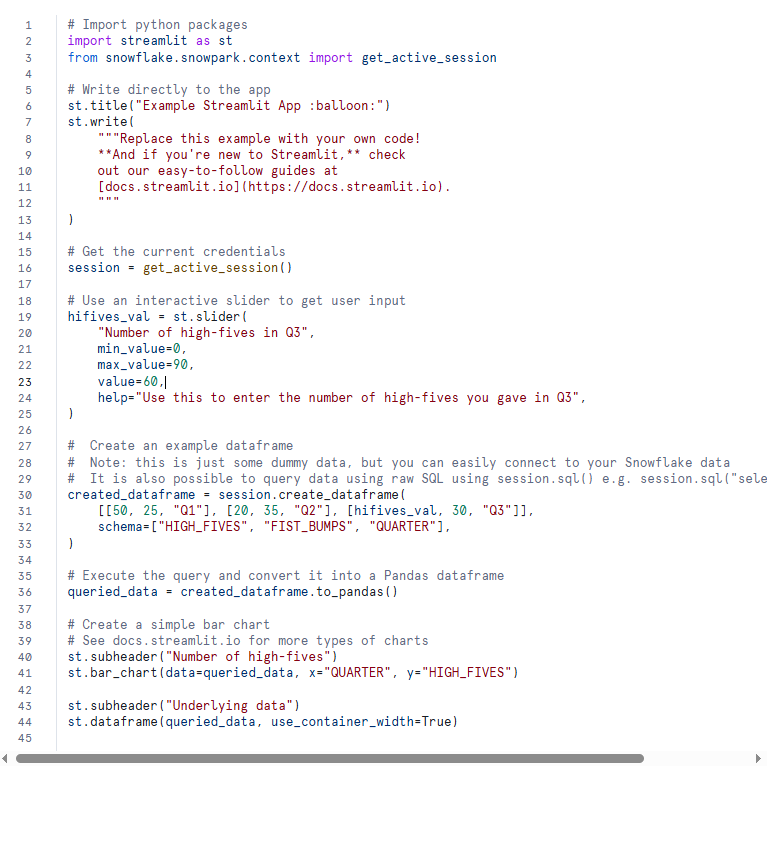
2) Code editor: The central panel is where you’ll write your Python code for the Streamlit app. It comes pre-populated with a simple example app.
3) App preview: On the right side, you’ll see a preview of your Streamlit app. This updates in real time as you modify your code, allowing for rapid development and testing.

4) Run button: At the top of the editor, you’ll see a “Run” button. Click this to execute your code and update the app preview.

Step 9—Manage packages for your Streamlit app
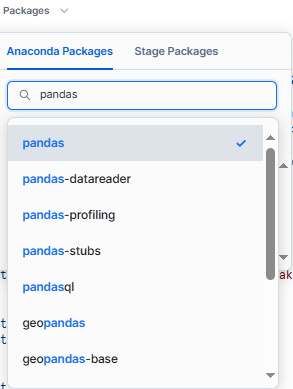
Before we start coding, make sure you’ve got the necessary packages. Hit the “Packages” drop-down button at the top of the editor. You’ll see a list of pre-installed ones like streamlit and snowflake-snowpark-python, plus a few more.

To add a new package, search for it in the search bar and click on it to install. In this case, we’re going to add pandas, which is handy for data manipulation. Type in “pandas” and it will be added to your app.
Step 10—Write your custom Streamlit code
Now, let’s write a simple Streamlit app that connects to your Snowflake data. But first, run the following SQL commands in Snowflake to create a table and populate it with dummy data:
CREATE TABLE petowners (
		 id INT,
		name VARCHAR(80),
		 pet VARCHAR(80)
);

INSERT INTO pet owners (id, name, pet) VALUES
(1, 'Elon Musk', 'dog'),
(2, 'Jeff Bezos', 'cat'),
(3, 'Bill Gates', 'parrot'),
(4, 'Bernard Arnault', 'hamster'),
(5, 'Warren Buffett', 'goldfish'),
(6, 'Mark Zuckerberg', 'turtle'),
(7, 'Larry Page', 'rabbit'),
(8, 'Sergey Brin', 'dog'),
(9, 'Steve Ballmer', 'cat'),
(10, 'Larry Ellison', 'dog'),
(11, 'Mukesh Ambani', 'cat'),
(12, 'Amancio Ortega', 'iguana'),
(13, 'Gautam Adani', 'dog'),
(14, 'Carlos Slim', 'parrot'),
(15, 'Michael Bloomberg', 'fish'),
(16, 'David Thomson', 'snake'),
(17, 'Jim Walton', 'cat'),
(18, 'Alice Walton', 'horse');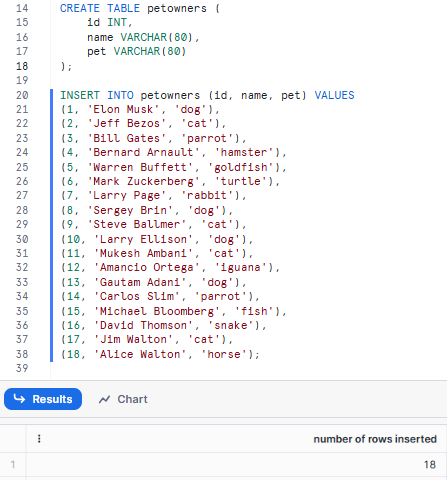
To create a Streamlit app, here is an example of a simple interactive app that connects to Snowflake and displays data from the petowners table. Replace the existing code in the editor with the following:
# Import python packages
import streamlit as st
import pandas as pd
from snowflake.snowpark.context import get_active_session

# Get the current credentials
session = get_active_session()

# Title
st.title("Pet Owners Data")

# Slider to filter by the number of records
limit = st.slider("Select number of records to display", min_value=1, max_value=20, value=5)

# Chatbox to get user's input
user_input = st.text_input("Enter a pet type to filter (e.g., dog, cat, parrot, hamster, goldfish, turtle, rabbit, bird, iguana, fish, snake, horse):")

# Query data from Snowflake with a filter and limit
if user_input:
		 query = f"SELECT * FROM petowners WHERE pet = '{user_input}' LIMIT {limit};"else:
		query = f"SELECT * FROM petowners LIMIT {limit};"df = session.sql(query).to_pandas()

# Display the filtered data
st.write(f"Displaying {limit} records for pet type: {user_input if user_input else 'All'}")
st.dataframe(df)
Step 11—Run your Streamlit app
Now that we’ve written our app, let’s run it:
Click the “Run” button at the top of the editor.
You should see the app preview on the right side update with your new app.

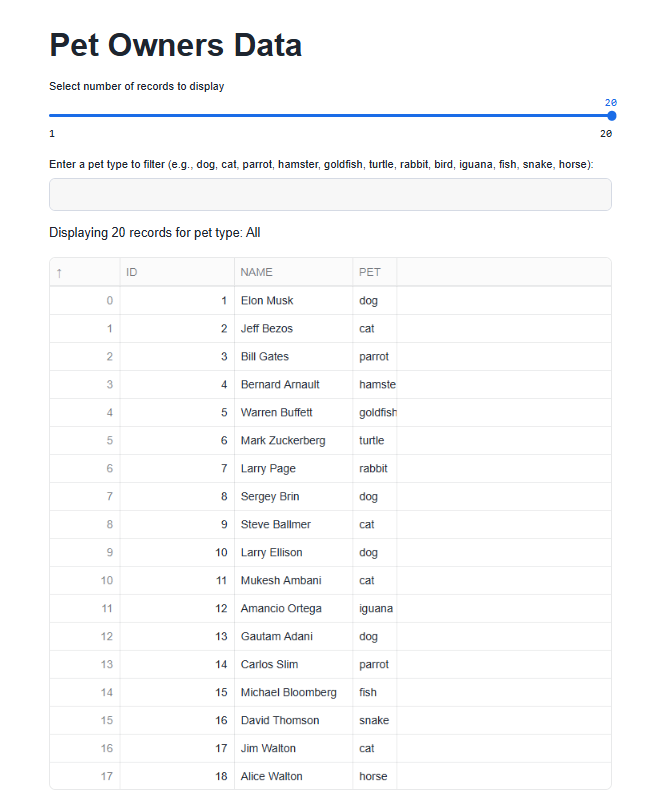
Test out the slider and chatbox to see how it filters the data in real time.
Step 12—Deploy and share your Streamlit app
Once you’re happy with your app, you can deploy and share it with others. To do this, go to the top left corner of the editor and click “Share“. This opens a sharing dialog where you can control who gets access. Simply type in a role name and choose it from the dropdown. Or, if you prefer, you can copy and paste your app’s URL to share it directly. When you’re done, just click “Done“.
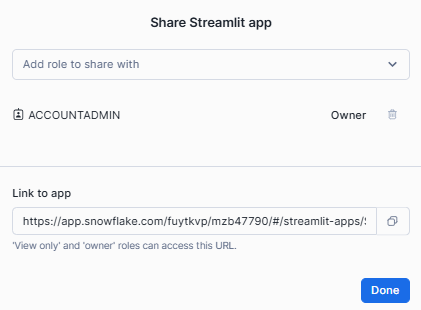
Now, users with the specified roles can access your Streamlit app directly through the provided URL.
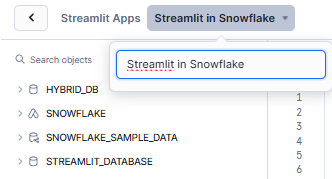
Step 13—Renaming your Streamlit app
To rename your Streamlit app, start by clicking the app name in the top-left corner of the editor. Then, click on the current app name. Enter the new name in the text box that pops up. To save the new name, just click outside the text box.
Step 14—Deleting Streamlit App
To get rid of your Streamlit app, head to the kebab icon at the top-right corner of the editor and click on it. Then, select “Delete“. Next, just confirm that you really want to delete the app.
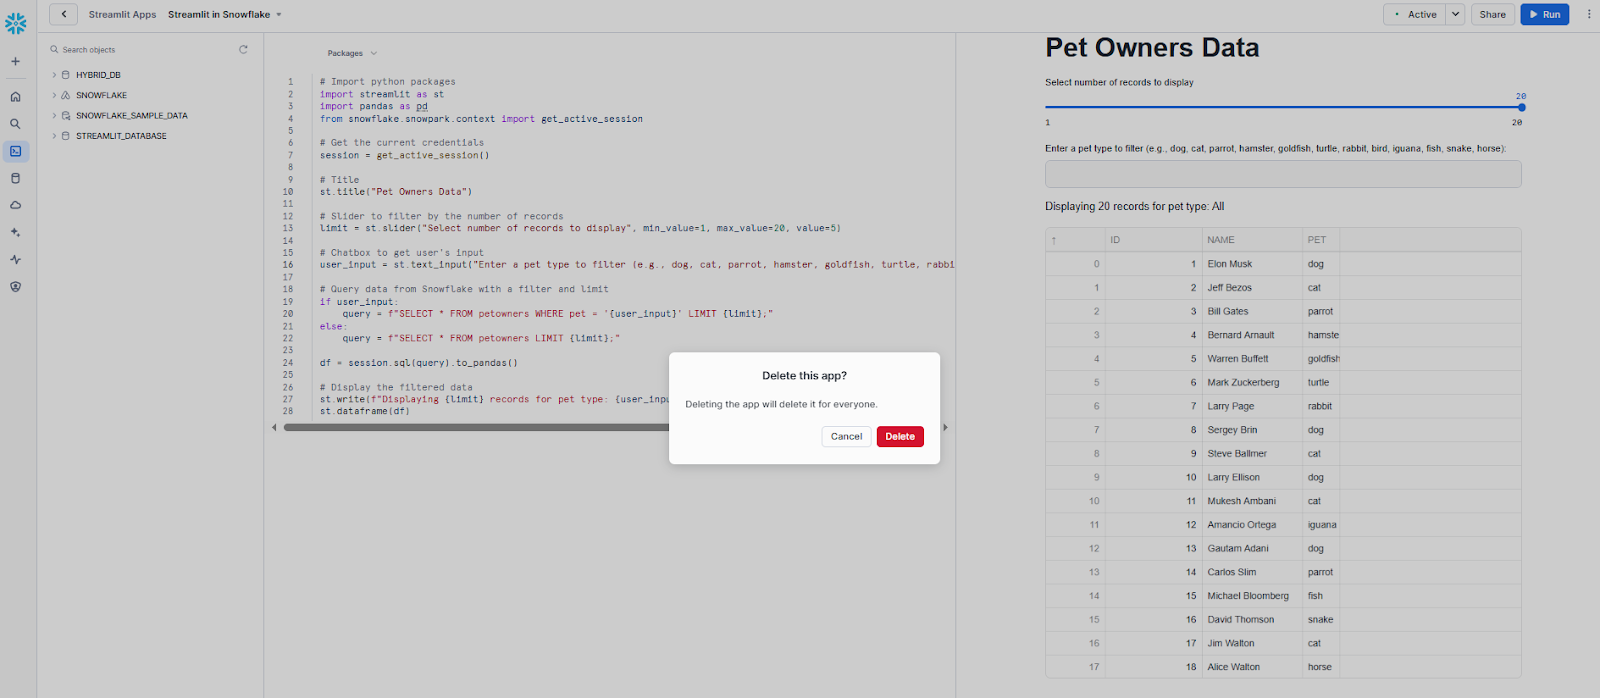
Note: Deleting an app is permanent and cannot be undone, so be sure before proceeding.
To get going with Streamlit and Snowflake, just follow these steps. As you get to know the platform, you’ll be able to build more complex applications that take advantage of Snowflake’s data processing capabilities and Streamlit’s interactive features.
What kinds of apps can you create using Streamlit in Snowflake?
Streamlit in Snowflake opens up a world of possibilities for creating interactive data applications. Here are some common types of applications you can build:
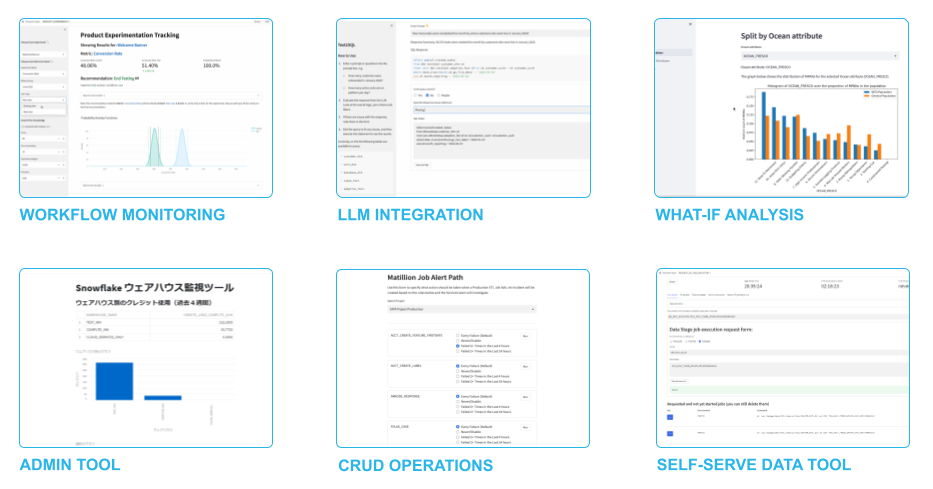
1) Admin tools
Streamlit is a great choice for building administrative tools in Snowflake. It’s really useful for managing and monitoring your environment. For example, you could create:
╰➤ A User Management Dashboard that displays user activity, manages roles and permissions and tracks resource usage.
╰➤ Warehouse Monitoring tools can also be built with Streamlit. These show real time and historical performance data, helping you optimize resources and reduce costs.
╰➤ Another option is Data Quality Monitoring. With Streamlit, you can track key metrics, set up alerts for anomalies and visualize data health across your Snowflake environment.
2) CRUD interfaces
Streamlit is mainly for visualizing and exploring data, but you can also use it to create simple interfaces for managing your Snowflake data. These interfaces can handle Create, Read, Update and Delete tasks:
╰➤ Forms for adding new data right into your Snowflake tables.
╰➤ Interfaces for updating existing records in your Snowflake tables.
╰➤ Controlled tools for safely removing or archiving data.
You can use these interfaces to input new data, edit existing records, or delete data from your Snowflake tables.
3) Workflow monitoring
Streamlit applications can be incredibly powerful for monitoring and managing complex workflows. For instance:
Monitoring ETL pipelines is a breeze. Just create a dashboard that shows the status of your ETL jobs – think success rates, processing times and error logs.
You can also track the progress of business processes and pinpoint areas that need a boost. Just build an app that visualizes the workflow and highlights any bottlenecks.
Lastly, Streamlit applications make it easy to stay on top of Service Level Agreements (SLAs) across different business operations. You can develop a tool that tracks and visualizes SLA compliance in no time.
4) LLM and AI interfaces
People are getting more into Large Language Models and with Streamlit in Snowflake, you can build interfaces for applications that use LLMs.
For example, you can:
╰➤ Create chatbots that answer questions about your data or give you insights based on what’s in Snowflake.
╰➤ Make applications that use LLMs to generate reports, summaries, or other text content based on your data.
╰➤ Develop tools that analyze and visualize sentiment in customer feedback, social media data, or other text you’ve got stored in Snowflake.
5) What-if analysis tools
Streamlit’s interactive widgets make it perfect for creating what-if analysis tools:
╰➤ Financial Modeling: Build applications that let users play around with financial numbers and see how they impact their projections and forecasts.
╰➤ Resource Allocation: Create tools to help with scenario planning, showing how different resource distributions can change outcomes.
╰➤ Marketing Campaign Optimization: Make applications that let marketers tweak their campaigns and get a sense of the predicted results based on historical data.
6) Data exploration and visualization
Streamlit with Snowflake is all about creating interactive tools for data exploration and visualization. Take interactive dashboards, for instance. They enable users to filter, sort and dive deeper into their Snowflake data. Streamlit also lends itself well to data storytelling, where you craft applications that guide users through their data using a blend of text, charts and interactive features. Or you might build anomaly detection tools, which make it easier for users to spot unusual patterns or outliers in their data and dig in for a closer look.
7) Machine Learning interfaces
Streamlit in Snowflake is awesome for building interfaces for machine learning models. You can create three types of interfaces:
Model Training Interfaces—these let data scientists play around with different model parameters and see the results in real time. You can also build Prediction Tools, where users can input data and get instant predictions from models stored in Snowflake. Plus, Model Performance Monitoring makes it easy to create dashboards that track how your deployed models are performing over time.
… and so much more!!!!. The possibilities with Streamlit in Snowflake are virtually endless. It all comes down to figuring out what your organization needs and playing to the strengths of both Streamlit and Snowflake. When you do, you’ll be able to build applications that really deliver value to your users.
What are the limitations of Streamlit in Snowflake?
Streamlit in Snowflake comes with several limitations that can impact its flexibility and use for specific scenarios:
1) Unsupported Streamlit features
The following Streamlit features remain unsupported or partially supported:
- st.set_page_config: The page_title, page_icon, and menu_items properties don’t work
- st.bokeh_chart: Irrelevant in practice—Streamlit itself removed this command in v1.34.0
- config.toml theming: Some configuration options work; others don’t. Check the Snowflake documentation for the current list
- External stages: Not supported as a source for Streamlit app files
- .so (compiled extension) files: Not supported
- Custom components that call external services: Not supported in either runtime
Note: st.file_uploader and st.camera_input are now both generally available in SiS. The older versions of this article listed them as unsupported—that’s no longer accurate.
2) Caching limitations (warehouse runtime only)
In the warehouse runtime, st.cache_data and st.cache_resource only cache within a single session. Cached values aren’t shared across users. In the container runtime, full cross-session caching is supported.
3) Content Security Policy (CSP) restrictions
All SiS apps run under a Content Security Policy that blocks loading resources from external domains. This includes external JavaScript files, external stylesheets, and external iframes. You can’t import front-end libraries from a CDN. Mapbox and Carto map tiles are allowed for st.map and st.pydeck_chart in warehouse runtimes (subject to accepting the External Offerings Terms).
4) Data retrieval limit (warehouse runtime)
The warehouse runtime has a 32 MB cap on data transferred between the Snowflake backend and the browser frontend in a single command (like st.dataframe). Exceed that and you get a MessageSizeError. The fix is to paginate your queries or retrieve smaller datasets. The container runtime doesn’t have this specific limitation.
5) Package availability (warehouse runtime)
In the warehouse runtime, you’re limited to packages in the Snowflake Anaconda Channel. If you need a package that isn’t there, your options are the container runtime (which supports PyPI via External Access Integration) or restructuring your logic into a Snowflake UDF or stored procedure.
6) No custom CSS or JavaScript injection
You can’t inject custom CSS or JavaScript to restyle your app. st.html with unsafe_allow_javascript=True won’t execute scripts due to the CSP. If your use case requires deep UI customization, SiS probably isn’t the right tool.
7) Not designed for high-traffic public apps
SiS is built for internal tools and team-facing applications. It’s not optimized for high-concurrency public-facing web apps. If you need to serve hundreds of concurrent external users with sub-second response times, you’re looking at the wrong platform.
8) Container runtime cost management
Container runtimes don’t auto-stop when sessions end. Compute pools keep running unless you stop them explicitly or set up a scheduled task to do it. That’s a cost management concern you need to plan for.
These limitations might cause issues with more complex use cases, especially ones that involve linking to external tools or pulling a lot of data.
Save up to 30% on your Snowflake spend in a few minutes!
Conclusion
And that’s a wrap! Are you tired of dealing with complicated data app development? Streamlit in Snowflake is your answer. It brings together Snowflake’s heavy-duty data processing + storage and Streamlit’s user-friendly app-building framework. This lets organizations to morph data into lively applications promptly.
Here are the perks:
- No hassle with infrastructure management
- Top-notch security for enterprises
- Handling large datasets is no problem
- Easy access to your data
- Develop and iterate quickly
- Simple collaboration and sharing
Just a heads up—there are some limitations to consider, like features that aren’t supported and limits on data retrieval. Knowing about these helps you design better applications.
You can build all sorts of applications with Streamlit in Snowflake, from admin tools to interfaces for machine learning. To get the most out of it, understand what it’s good at and what it’s not and apply it to the right challenges.
In this article, we have covered:
- What is Streamlit?
- Streamlit in Snowflake—native integration
- Step-by-step guide to building and deploying interactive data applications using Streamlit in Snowflake
- What kinds of applications can you create using Streamlit in Snowflake?
- What are the limitations of Streamlit in Snowflake?
… and much more!
FAQs
What is Streamlit in Snowflake?
Streamlit in Snowflake (SiS) is a native integration that lets you build, deploy, and share data applications directly within Snowflake using the Streamlit Python library.
Did Snowflake buy Streamlit?
Yes. Snowflake acquired Streamlit on March 2, 2022, for approximately $800 million.
What is Streamlit used for?
Building interactive web applications for data science, machine learning, and data visualization; using only Python, no front-end development required.
What are the main benefits of Streamlit?
Simplicity, fast iteration, a wide range of built-in widgets, and native integration with the Python data science ecosystem.
When should I use Streamlit?
When you need to quickly build an internal data tool, dashboard, or prototype and don’t want to write JavaScript or manage web infrastructure.
How does Streamlit in Snowflake differ from standalone Streamlit?
SiS runs inside Snowflake, which means you get automatic data access, Snowflake RBAC for security, and managed infrastructure. The trade-off is tighter package restrictions (in the warehouse runtime) and CSP constraints on external resources.
Can I use any Python package?
In the warehouse runtime, no, you’re limited to the Snowflake Anaconda Channel. In the container runtime, you can install packages from PyPI via an External Access Integration, giving you much broader coverage.
How do I share my Streamlit app?
Grant a Snowflake role the USAGE privilege on your app and share the app’s URL. Users need a Snowflake account with that role assigned.
Is Streamlit in Snowflake suitable for production?
For internal tools and team-facing applications, yes. For high-traffic public-facing apps with strict latency requirements, it’s not the right fit.
Can I use Streamlit in Snowflake for machine learning?
Yes. You can build training interfaces, prediction tools, and model monitoring dashboards. The container runtime adds GPU support for compute-intensive inference tasks.
Is there a data size limit?
In the warehouse runtime, yes, 32 MB per single Streamlit command output. Paginate your queries if you’re hitting that ceiling. The container runtime doesn’t have this specific constraint.
Can I create multi-page apps?
Yes. You can create multi-page apps directly in Snowsight using the file editor. No SQL commands required. Use st.navigation (Streamlit v1.36+) or the pages folder convention.
How secure is Streamlit in Snowflake?
It inherits Snowflake’s RBAC, data encryption at rest and in transit, audit logging, and compliance certifications. Because data doesn’t leave Snowflake to be processed, the security posture is strong for regulated environments.
Can I use Streamlit in Snowflake for real-time data processing?
SiS supports near-real-time data, you can poll fresh data on each script rerun. It’s not designed for true streaming or sub-second latency applications. The container runtime is better suited for apps that need persistent connections, like LLM streaming responses.