The use of large language models (LLMs) has moved from research labs into production systems faster than anyone predicted. A whole lot of companies and businesses are racing to figure out how to use AI on their own data without building custom infrastructure or hiring an army of engineers. The problem? Most AI tools live outside your data platform. You’re shuffling information back and forth, worrying about security, dealing with inconsistent answers and watching costs spiral. That gap created demand for AI that reasons over enterprise data while enforcing governance. For users of the Snowflake platform, there’s good news. In mid-2025, during the Snowflake Summit event, Snowflake announced its state-of-the-art Snowflake Intelligence feature, which reached general availability on November 4, 2025.
Snowflake Intelligence is the answer to bringing AI directly to your data instead of the other way around. It’s an agentic platform that lets business users ask questions in plain English and get answers, charts and actions, all within the governed environment of the Snowflake platform and without having to write complex query or wait for analysts to build custom dashboards. No data leaves your account in the cloud, and there’s no need to manage separate vector databases or complex retrieval-augmented generation (RAG) pipelines.
In this article, we’ll provide an in-depth technical overview of what Snowflake Intelligence is, how it works under the hood, how to set it up step by step, what you can do with it, its limitations and so much more.
What is Snowflake Intelligence?
Snowflake Intelligence is an enterprise AI agent platform built into Snowflake. It’s designed to let any user talk to their data in plain English without writing complex SQL and get instant insights and visualizations. Under the covers, Snowflake Intelligence spins up Snowflake Cortex Agents – AI agents that orchestrate multiple services (LLMs, search, SQL) to answer questions or take actions. These agents connect to your structured tables (via the Snowflake Cortex Analyst tool and Snowflake semantic models), unstructured documents (via the Snowflake Cortex Search feature and embeddings) and any custom tools (via stored procedures or integrations) you configure. The agent can then translate a user question into the right mix of SQL queries, semantic search queries and actions and combine the results into a response or chart.
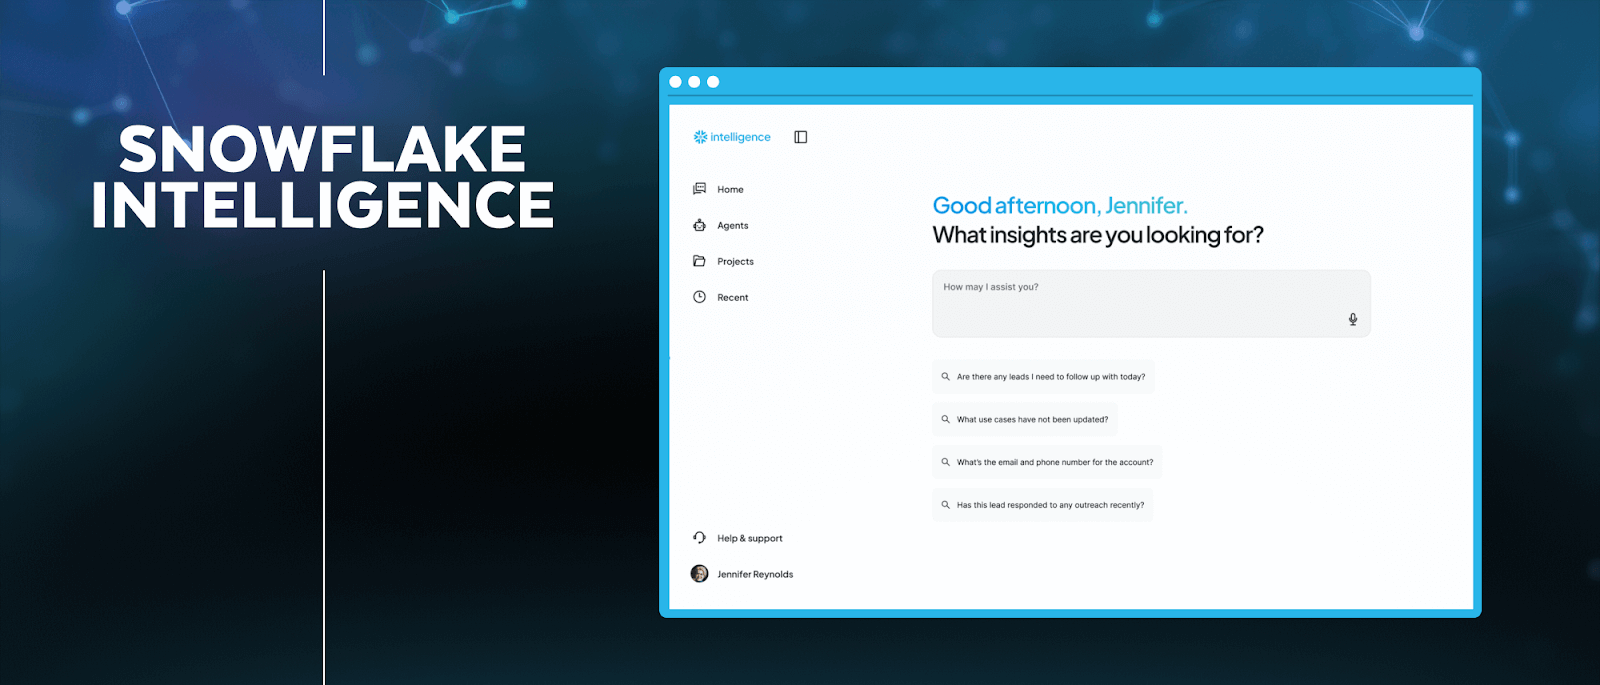
Figure 1: Snowflake Intelligence (Source: Snowflake)
Key elements and features of Snowflake Intelligence
Here are some key features of Snowflake Intelligence:
- Data analysis through LLM-to-SQL—Snowflake Cortex Analyst translates natural language questions into SQL queries against your structured data. It’s using Snowflake semantic models defined in YAML files to understand business terminology and generate accurate SQL that respects your schema relationships.
- Data insight generation—The Snowflake Intelligence uses retrieval-augmented generation (RAG) combined with summarization to extract insights from unstructured data. You can upload PDFs, Microsoft Word documents or spreadsheets to Snowflake stages, index them with the Snowflake Cortex Search feature, and the agent can answer questions about their contents alongside structured data.
- Custom actions—You’re not only limited to read-only queries. Agents can execute stored procedures, call external APIs via webhooks or trigger automated workflows.
- Managed embeddings and vector search—The Snowflake Cortex Search feature handles all the embedding generation and infrastructure for semantic search. You’ll point it at a table column containing text, and it builds a hybrid index (vector embeddings and keyword search) with automatic semantic reranking.
- In-Snowflake LLM and embedding functions—Snowflake Cortex AI Functions let you call large language models (LLMs) directly in SQL for tasks like sentiment analysis, text classification and summarization.
- Agent orchestration—Snowflake Cortex Agents handle the planning layer. Whenever you ask a complex question requiring both structured and unstructured data, the agent parses your request, splits it into subtasks, routes queries to the appropriate tools and synthesizes a coherent response.
- Governance, auditability and RBAC—Every query respects your existing role-based access control (RBAC). If a user can’t see certain data in Snowflake, the Snowflake Intelligence won’t expose it. All queries are logged, auditable and governed by the same security framework as the rest of your Snowflake environment.
- Multi-model support with automatic selection—The Snowflake Intelligence supports leading LLMs, including Anthropic Claude models and OpenAI GPT models. You can set the agent to “Auto” by default, and Snowflake will choose the best available model (currently that’s Claude 4.5/4.0/3.7/3.5 and GPT 5/4.1). But if your region doesn’t have a model right there, you can switch on cross-region inference for access.
- On-the-fly insights and visualizations—Beyond just raw answers, the agent can create charts or tables from query results. The Data-to-Chart tool in an agent can make Vega-Lite charts on the spot, so you can see data trends visually without needing to set up a dashboard manually.
- Conversation threading—Interactions are stateful. The Snowflake Intelligence platform supports threaded conversations so an agent remembers context. You can follow up or refine your queries naturally, and the system uses the thread history to maintain continuity.
Snowflake Intelligence puts all these pieces together so end users can explore data by asking questions, without the need to code or wait for business intelligence (BI) teams.
Cost breakdown of the Snowflake Intelligence
Snowflake Intelligence doesn’t have its own pricing tier. Instead, you pay for the underlying services it uses. There are three main cost drivers:
- Snowflake Cortex Analyst requests (for structured data queries)
- Snowflake Cortex Search feature usage (for unstructured data searches)
- Snowflake Virtual Warehouse execution (for running the generated SQL)
Let’s break down the cost of each one.
1) Snowflake Cortex Analyst cost
Snowflake Cortex Analyst tool uses message-based pricing when accessed through the Snowflake Intelligence interface.
Snowflake Cortex Analyst costs ~67 credits per 1000 messages when used through the Snowflake Cortex Analyst API directly.
But when you’re using it via the Snowflake Intelligence platform, the pricing shifts to a token-based model per million tokens:
Table 1: Credit Consumption Rates for Snowflake Cortex / Snowflake AI Models (Per 1M Tokens)
| Model | Input (Credits/1M tokens) | Output (Credits/1M tokens) | Cache Write | Cache Read |
|---|---|---|---|---|
| claude-3-5-sonnet | 2.51 | 12.55 | – | – |
| claude-3-7-sonnet | 2.51 | 12.55 | 3.14 | 0.25 |
| claude-4-sonnet | 2.51 | 12.55 | 3.14 | 0.25 |
| claude-haiku-4-5 | 0.92 | 4.60 | 1.15 | 0.09 |
| claude-sonnet-4-5 | 2.76 | 13.81 | 3.45 | 0.28 |
| openai-gpt-4.1 | 1.84 | 7.36 | – | 0.46 |
| openai-gpt-5 | 1.15 | 9.21 | – | 0.12 |
When using Snowflake Cortex Analyst through Snowflake Cortex Agents (which powers Intelligence), credit rates are slightly different:
Table 2: Credit Consumption Rates for Snowflake AI Models with Caching (Per 1M Tokens)
| Model | Input (Credits/1M tokens) | Output (Credits/1M tokens) |
|---|---|---|
| claude-3-5-sonnet | 3.14 | 15.69 |
| claude-3-7-sonnet | 3.14 | 15.69 |
| claude-4-sonnet | 3.14 | 15.69 |
| claude-haiku-4-5 | 1.15 | 5.75 |
| claude-sonnet-4-5 | 3.45 | 17.26 |
| mistral-large2 | 2.09 | 6.28 |
| openai-gpt-4.1 | 2.30 | 9.21 |
| openai-gpt-5 | 1.44 | 11.51 |
Notice the markup? Using Snowflake Cortex Analyst through Intelligence adds roughly 25% to the base token costs. That’s the price of convenience.
Here’s what those credits actually cost based on your Snowflake edition and region (using US East Northern Virginia on AWS as the baseline):
- Standard edition: $2.00 per credit
- Enterprise edition: $3.00 per credit
- Business Critical edition: $4.00 per credit
- VPS edition: $6.00 per credit
If you’re running claude-sonnet-4-5 on Enterprise Edition through Snowflake Intelligence, you’re paying:
- Input: 3.45 credits × $3.00 = $10.35 per million input tokens
- Output: 17.26 credits × $3.00 = $51.78 per million output tokens
2) Snowflake Cortex Search
Snowflake Cortex Search handles queries against unstructured data. The pricing model is more complex because you’re paying for both indexing and searching.
Snowflake Cortex Search costs 6.3 credits per GB/month of indexed data.
But that’s just the serving compute. You also pay for:
- Embedding tokens during indexing
- Snowflake virtual warehouse compute for refreshes
- Storage for the indexes ($23/terabyte (TB) per month base rate)
- Cloud services costs
A 100GB search index costs 630 credits/month just for serving compute. On Enterprise Edition, that’s $1890/month before you’ve run a single search query.
3) Snowflake virtual warehouse execution costs
Here’s what many teams miss: the Snowflake Cortex Analyst tool generates SQL, but you still pay for executing that SQL. The generated queries run on your Snowflake virtual warehouses, consuming credits based on:
- Snowflake virtual warehouse size
- Execution time
- Query complexity
Standard Snowflake virtual warehouse sizes:
Table 3: Credit Consumption Rates for Snowflake Virtual Warehouse Sizes
| Size | Credits/Hour |
|---|---|
| XS | 1 |
| S | 2 |
| M | 4 |
| L | 8 |
| XL | 16 |
| 2XL | 32 |
| 3XL | 64 |
| 4XL | 128 |
| 5XL | 256 |
| 6XL | 512 |
If your Intelligence-generated queries run on a Medium Snowflake Virtual warehouse and take 5 minutes to execute, that’s (4 credits/60 minutes) × 5 minutes = 0.33 credits per query. Add this to the Analyst costs.
Here’s the breakdown of what it actually costs to run Snowflake Intelligence:
Let’s say your team runs 10,000 Intelligence queries per month on the Enterprise Edition using claude-sonnet-4-5 model.
Here’s the cost breakdown:
Snowflake Cortex Analyst costs (assuming avg ~250 input + 750 output tokens per query):
- Input: (250 tokens * 10000 queries) / 1000000 = 2.5M tokens * 3.45 credits = 8.625 credits * $3 = $25.88
- Output: (750 tokens × 10000 queries) / 1000000 = 7.5M tokens * 17.26 credits = 129.45 credits * $3 = $388.35
Snowflake Virtual Warehouse execution (assuming Medium warehouse, 30 seconds avg per query):
- (4 credits/hour) * (30 seconds/3600 seconds) * 10000 queries = 33.33 credits * $3 = $100
Snowflake Cortex Search (if using a 50GB index):
- Serving compute: 6.3 credits * 50 GB = 315 credits * $3 = $945/month
Monthly total: $1,459.23
That’s for pretty average use. Now scale it up to 100k queries a month and you’re looking at ~$13,092.30 (not counting the extra costs for embedding, storing all that data, or actually running the searches).
Why use Snowflake Intelligence?
Simple. Secure. Fast.
Data stays inside Snowflake. Inference and embedding generation run within the Snowflake platform’s execution environment or through vetted model integrations that honor Snowflake access controls.
Snowflake handles embedding generation, vector storage, model inference, and orchestration. Your team can focus only on Snowflake semantic models and agent logic, not infrastructure operations.
Responses return in seconds.
The only main downside is vendor lock-in. If data lives outside Snowflake you must move it or build connectors. Swapping in a custom fine-tuned model requires integrating external model endpoints or using an approved execution path, which adds complexity.
Architecture overview of Snowflake Intelligence
Snowflake Intelligence is built on a modular agent-based architecture within the Snowflake Cortex AI suite.
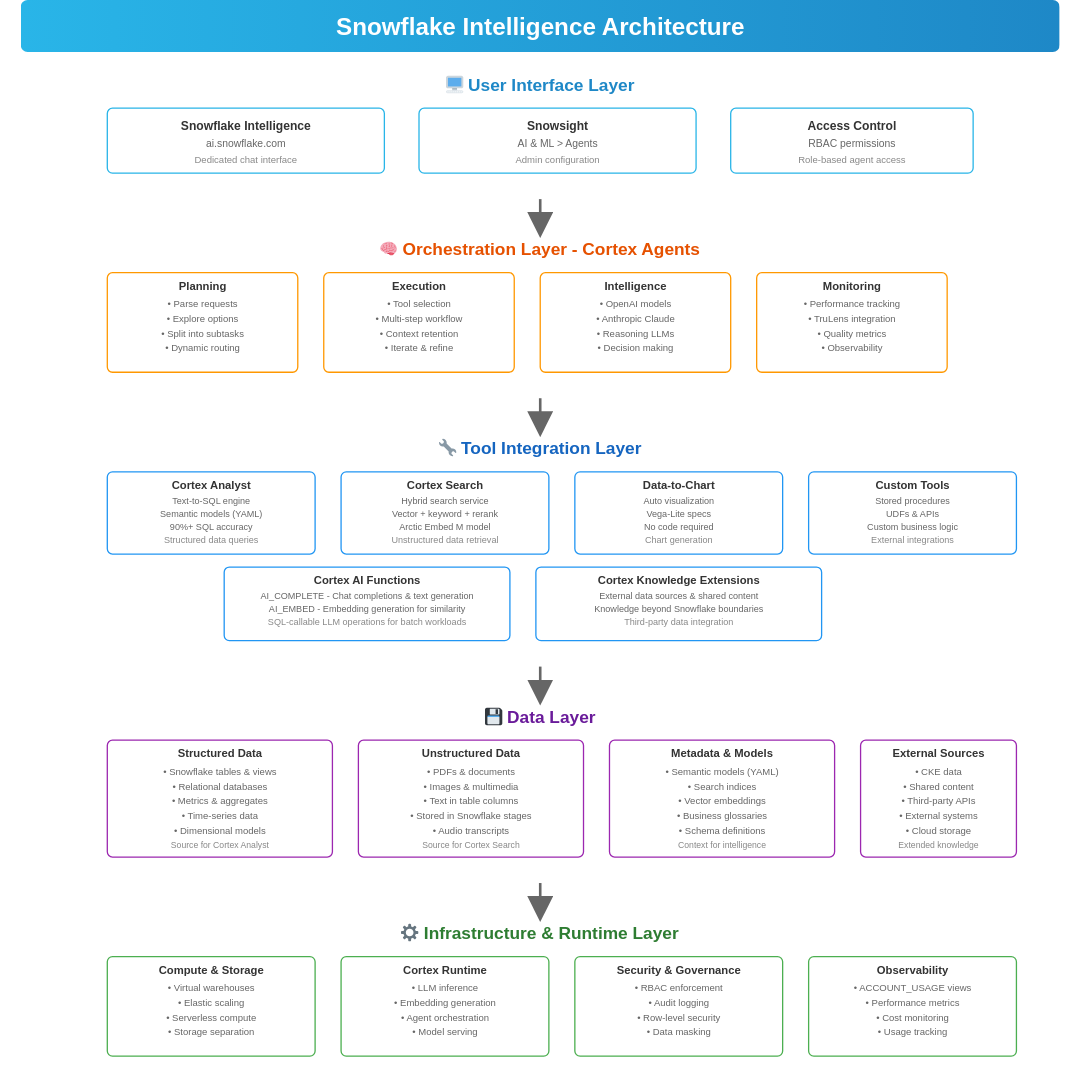
Figure 2: Snowflake Intelligence Architecture
User interface layer
The User Interface layer is the Snowsight web interface (under AI & ML > Agents > Snowflake Intelligence or the separate Snowflake Intelligence UI). Users type questions into a chat UI and see answers, charts, and the agent’s reasoning. Admins can configure agents here, too. The interface is simple (search or chat), but it connects to a rich backend for handling complex queries.
Orchestration layer (Snowflake Cortex Agent)
Snowflake Cortex Agents sit at the core of the system. When a user asks a question, the agent doesn’t immediately query data or search documents. Instead, it plans. Cortex Agent dynamically plans a multi-step workflow: for example, it might first fetch some context with a search query, then fire a SQL query via Snowflake Cortex Analyst, then maybe transform results with a function, and finally compose a natural-language answer. The planning loop constantly updates as new data comes in.
Tool integration layer
The agent invokes a variety of built-in and custom tools to execute tasks.
Snowflake Cortex Analyst
Snowflake Cortex Analyst is the LLM-powered text-to-SQL engine. It converts natural language questions into optimized SQL queries against structured tables. It relies on Snowflake semantic models to map natural language to table/column names, metrics, and business concepts. Snowflake builds an internal schema-aware model from your database for better understanding. Queries execute on live data using your specified Snowflake Virtual warehouses.
Snowflake Cortex Search
Snowflake Cortex Search is a fully managed hybrid search service. It combines vector embeddings (for semantic similarity) with keyword search (for exact matches) and applies a neural reranker to surface the most relevant results. You create a Cortex Search service by pointing it at a table column containing text. Snowflake automatically generates embeddings, builds an index, and keeps it synchronized as data changes. You can filter results by metadata (like document type or date range) and configure which embedding model to use.
Data visualization (Data-to-Chart)
An agent can use a built-in tool to render query results as charts. If a user’s question would benefit from a graph, the agent auto-generates a Vega-Lite chart. This tool is enabled by adding data_to_chart in the agent’s configuration.
Custom Tools and Stored Procedures
You can integrate custom tools via Snowflake stored procedures or user-defined functions (UDFs) for custom logic, such as refreshing an external table or calling an HTTP webhook to an external service. These are added as steps in the agent’s reasoning flow, with configurations for name, description, parameters and warehouse. Grant USAGE privileges to enable access.
Snowflake Cortex AI Functions (LLM and embeddings in SQL)
Snowflake Cortex AI Functions are the built-in SQL functions that let the agent (or any user) run LLM operations directly. For example, agents might call AI_COMPLETE for a chat completion, or AI_EMBED for embedding text to compare similarity. These functions are optimized for batch workloads.
Data layer
Data layer contains your actual data:
- Structured data in Snowflake tables and views
- Unstructured data (PDFs, documents, images) stored in Snowflake stages
- Snowflake semantic models that map business concepts to physical schemas for Cortex Analyst
- Search indices managed by Cortex Search, including Snowflake Cortex Knowledge Extensions for external or shared content
Infrastructure and runtime layer
At the bottom sits Snowflake’s data platform infrastructure. Snowflake handles compute, storage, and model serving. Snowflake Virtual warehouses execute SQL queries. Serverless compute runs AI functions. The Cortex runtime manages LLM inference, embedding generation, and agent orchestration without you needing to provision anything.
TL;DR: Snowflake Intelligence is essentially Cortex Agents + Cortex Analyst + Cortex Search + Cortex AI Functions all working together in a secure Snowflake environment. Workflow:
1) User asks a question via the UI (ai.snowflake.com or Snowsight)
2) Snowflake Cortex Agent receives the query and creates an execution plan using LLMs
3) Agent routes tasks to appropriate tools:
- Snowflake Cortex Analyst for SQL queries on structured data
- Snowflake Cortex Search for semantic retrieval from unstructured data
- Custom tools for specialized logic or external integrations
- Data-to-Chart for visualization
4) Each step executes as a regular Snowflake operation (SQL query or AI function call)
5) Agent synthesizes results and presents answer with charts/visualizations 6) All operations benefit from Snowflake’s scalability, security, and governance
Now that we’ve covered what Snowflake Intelligence is and how it works, let’s dive into how to configure and run it from scratch.
Step-by-step guide to configuring and running the Snowflake Intelligence
Let’s walk through the full setup from scratch. Make sure you have a Snowflake account with administrative access.
Prerequisites and setup
Before starting, verify these requirements:
- Regional availability. Snowflake Intelligence is available across AWS, Azure, and GCP regions. If a model isn’t available in your region, enable Cortex Cross-region inference to route requests to regions where the model is hosted.
- Supported Snowflake AI models. Snowflake Intelligence supports the following models => Claude 4.5, Claude 4.0, Claude 3.7, Claude 3.5, GPT 5, GPT 4.1.
- Auto model selection is recommended to let the agent choose the best model for each query.
- Administrative privileges. The ACCOUNTADMIN role is required to create the Snowflake Intelligence object, as it holds the exclusive CREATE SNOWFLAKE INTELLIGENCE ON ACCOUNT privilege.
- Defined Snowflake roles following least-privilege principles. Plan to create custom Snowflake roles like SI_ADMIN, CORTEX_USER, and CORTEX_EMBED_USER for different access levels.
- Provisioned virtual warehouses. You’ll need active warehouses to execute SQL queries generated by Snowflake Cortex Analyst.
- Data infrastructure. Structured data modeled in tables, unstructured data stored in Snowflake stages, and prepared Snowflake semantic model YAML files or Snowflake semantic views.
- Basic knowledge of Snowflake SQL for roles, databases, schemas, tables, Snowflake stages, procedures, and YAML for semantic models.
- Private Connectivity (optional). For private network access, complete AWS PrivateLink or Azure Private Link setup before proceeding.
Step 1—Log in to the Snowflake platform
Sign in to Snowflake’s web UI (Snowsight) using an admin role. You’ll do most of the initial setup here.
Step 2—Create Snowflake roles, databases and Snowflake Virtual warehouses
Open a SQL worksheet in Snowflake Snowsight and execute the following setup commands:
USE ROLE ACCOUNTADMIN;
CREATE ROLE IF NOT EXISTS SI_ADMIN;
GRANT ROLE SI_ADMIN TO USER <-----your_username------->;
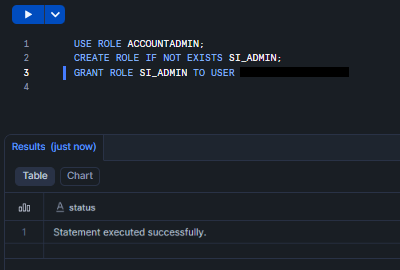
Figure 3: Creating and granting privilege to SI_ADMIN role – Snowflake Intelligence
CREATE DATABASE IF NOT EXISTS intelligence_db;

CREATE SCHEMA IF NOT EXISTS intelligence_db.intelligence_schema;
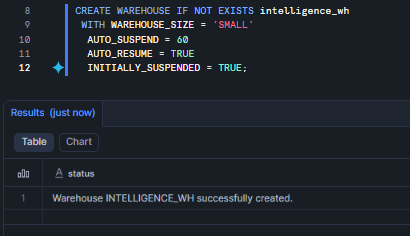
Figure 4: Creating Snowflake database and schema – Snowflake Intelligence
CREATE WAREHOUSE IF NOT EXISTS intelligence_wh
WITH WAREHOUSE_SIZE = 'SMALL'
AUTO_SUSPEND = 60
AUTO_RESUME = TRUE
INITIALLY_SUSPENDED = TRUE;

Figure 5: Creating Snowflake Virtual Warehouse – Snowflake Intelligence
Grant appropriate privileges on the database, schema and warehouse to your Snowflake roles.
Step 3—Initialize the Snowflake Intelligence object
You can now create the Snowflake Intelligence object via the Snowflake Snowsight interface or SQL.
Via the Snowflake Snowsight interface:
Navigate to AI & ML > Agents > Snowflake Intelligence tab.

Figure 6: Navigating to Snowflake Intelligence
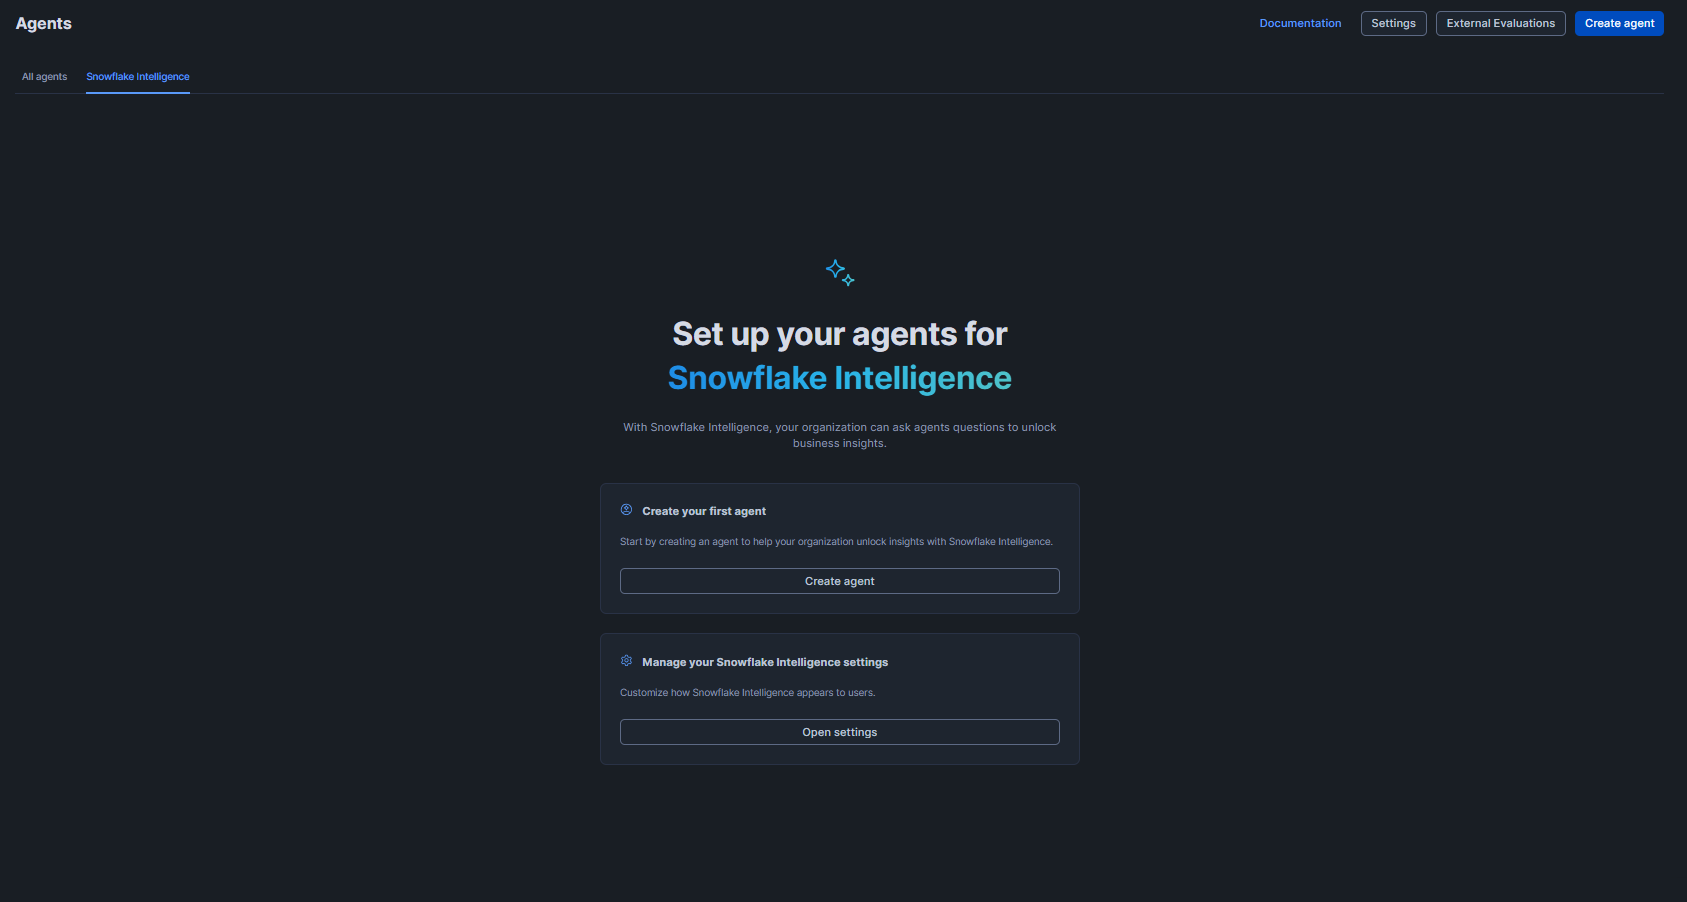
Figure 7: Navigating to Snowflake Intelligence
Open settings. The Snowflake Intelligence object is created automatically when you access settings for the first time.
Via SQL:
CREATE SNOWFLAKE INTELLIGENCE SNOWFLAKE_INTELLIGENCE_OBJECT_DEFAULT; Only one Snowflake Intelligence object can exist per account. This object acts as a container holding a curated list of agents available to users.
Step 4—Configure cross-region inference (optional)
If you need access to models not available in your region, enable cross-region inference.
First, identify your region category (aws_us, azure_us):
SELECT CURRENT_REGION(); 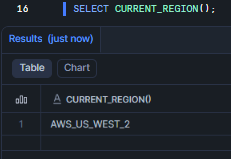
Figure 8: Identifying Snowflake Region – Snowflake Intelligence
Then configure cross-region inference:
ALTER ACCOUNT SET CORTEX_ENABLED_CROSS_REGION = 'ANY_REGION';
(Or specify regions like ‘AWS_US, AWS_EU’).
ALTER ACCOUNT SET CORTEX_ENABLED_CROSS_REGION = 'AWS_US';
This allows the Snowflake Intelligence platform to transparently call models deployed elsewhere. Without this, you’re stuck with whatever the local region offers.
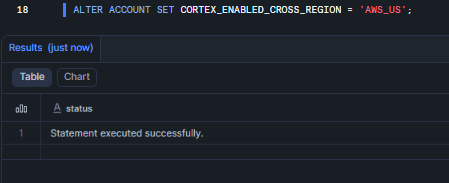
Figure 9: Configuring cross-region inference – Snowflake Intelligence
Note that cross-region inference incurs additional data transfer costs.
Step 5—Grant Snowflake Intelligence privileges and access control
Management rights:
GRANT MODIFY ON SNOWFLAKE INTELLIGENCE SNOWFLAKE_INTELLIGENCE_OBJECT_DEFAULT TO ROLE SI_ADMIN;
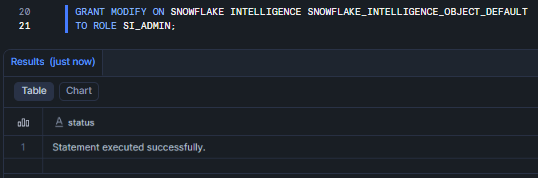
Figure 10: Granting MODIFY privileges on the default Snowflake Intelligence object to role SI_ADMIN
Usage rights for end users:
CREATE ROLE IF NOT EXISTS SI_USER;
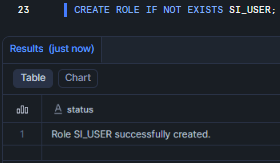
Figure 11: Creating the SI_USER role for Snowflake Intelligence
GRANT USAGE ON SNOWFLAKE INTELLIGENCE SNOWFLAKE_INTELLIGENCE_OBJECT_DEFAULT TO ROLE SI_USER;
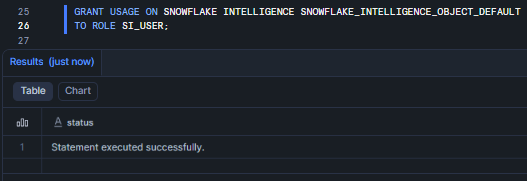
Figure 12: Granting USAGE privileges on the default Snowflake Intelligence object to role SI_USER
Database roles for Snowflake Cortex services:
GRANT DATABASE ROLE SNOWFLAKE.CORTEX_USER TO ROLE SI_USER;
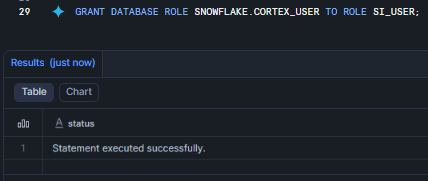
Figure 13: Granting the SNOWFLAKE.CORTEX_USER database role to role SI_USER—Snowflake Intelligence
GRANT DATABASE ROLE SNOWFLAKE.CORTEX_EMBED_USER TO ROLE SI_USER;
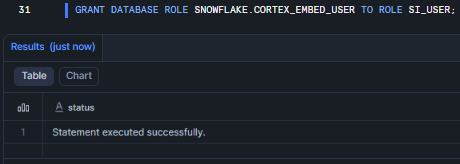
Figure 14: Granting the SNOWFLAKE.CORTEX_EMBED_USER database role to role SI_USER—Snowflake Intelligence
Step 6—Create a Snowflake Cortex Agent
Agents must be created before they can be added to the Snowflake Intelligence object.
Navigate to AI & ML > Agents > Create agent in Snowflake Snowsight.

Figure 15: Navigating to Agents in Snowflake Snowsight to create a new agent—Snowflake Intelligence
Select the Database and Schema, then enter the Agent object name. Next, add the name in the Display Name field, and finally, click on Create Agent.

Figure 16: Configuring agent name and details to create a new agent—Snowflake Intelligence
Provide an agent name, description, questions and configure tools (Snowflake Cortex Analyst, Snowflake Cortex Search services, custom tools). Then click Save.

Figure 17: Configuring agent details, questions, and tools in Snowflake Snowsigh—Snowflake Intelligence
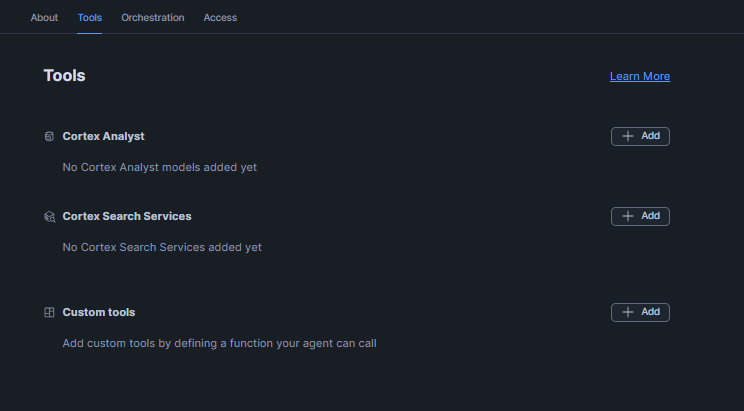
Figure 18: Configuring agent details, questions, and tools in Snowflake Snowsight—Snowflake Intelligence
Agents are NOT automatically added to the Snowflake Intelligence object; you must add them explicitly in the next step.
Step 7—Configure agent visibility
Control which agents appear in the Snowflake Intelligence interface:
To add an agent navigate to AI & ML > Agents > Snowflake Intelligence tab > Open settings > Review agent.
Select the agent.
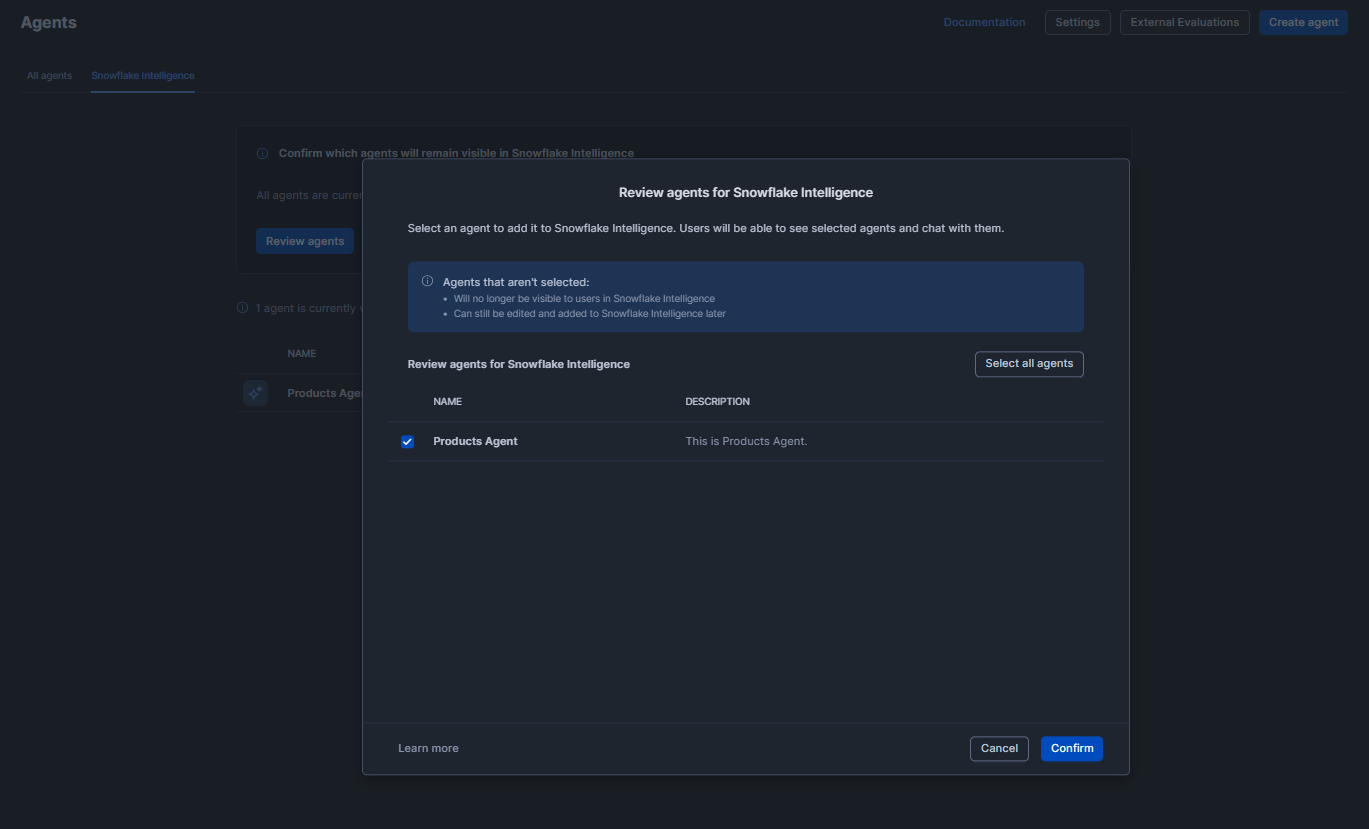
Figure 19: Selecting an agent for review in the Snowflake Intelligence settings
To remove an agent, click on that kebab menu and select “Remove agent.”

Figure 20: Removing an agent using the more actions menu— Snowflake Intelligence
Alternatively, you can also easily configure it via SQL directly:
ALTER SNOWFLAKE INTELLIGENCE SNOWFLAKE_INTELLIGENCE_OBJECT_DEFAULT ADD AGENT my_db.my_schema.SalesAgent;
To remove it, you can use DROP AGENT. Grant USAGE on each agent object to any role that should query it. Note that all agents you create in an account are visible to any user with access unless you curate the list. Creating a curated list (by populating the intelligence object) gives better control.
Users see agents based on this hierarchy: if the Snowflake Intelligence object exists and they have USAGE on it, they see only agents in the curated list. If no curated list exists, they see all agents they have individual access to.
Step 8—Configure private connectivity (advanced)
If your Snowflake platform is set up in private mode, you might need a PrivateLink connection to allow AI services. On the AWS cloud platform, ensure an AWS PrivateLink endpoint exists for Snowflake. On the Microsoft Azure cloud service, ensure Azure Private Link is configured for your account. These steps are outside the Snowflake Intelligence feature itself; they’re the same steps used for Snowflake’s Snowpark Container Services or native apps.
See the Snowflake documentation below on the PrivateLink feature for a more in-depth guide.
Once the PrivateLink feature is set up, the Snowflake Cortex AI inference APIs can be reached from your network.
Step 9—Customize the Snowflake Intelligence interface
From AI & ML > Agents > Snowflake Intelligence > Open settings, you can:
- Configure general settings like display name and description
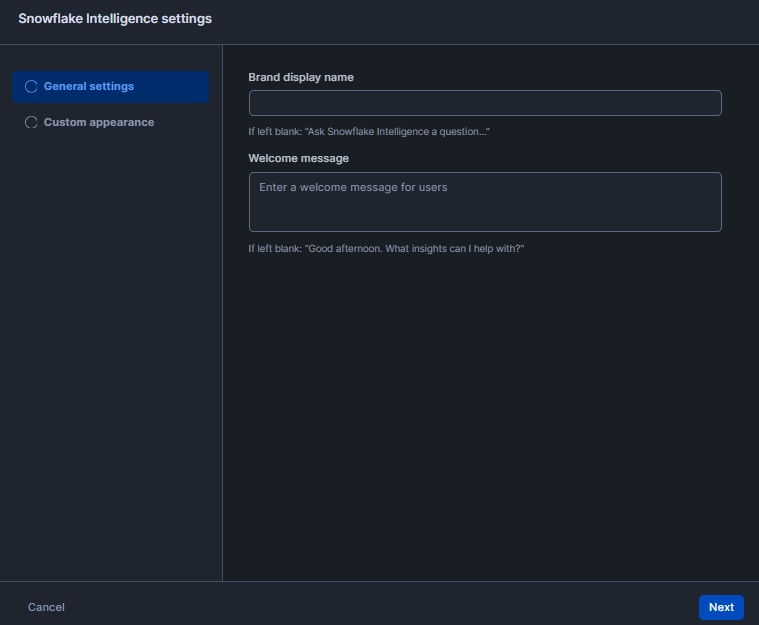
Figure 21: Configuring general Snowflake Intelligence settings in Snowflake Snowsight
- Customize appearance and branding
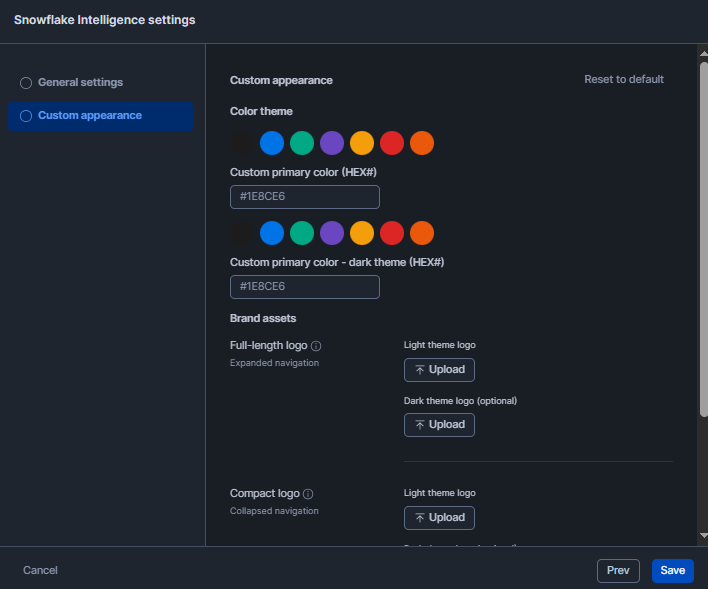
Figure 22: Customizing appearance and branding—Snowflake Intelligence
- Add sample questions to guide users
Save your configuration and verify that agents appear correctly for end users.
Step 10—Final fix
With the above done, test an agent: switch to a role with access, open a “New Chat” in the Snowflake Snowsight interface, pick your agent and ask a question. Verify it returns sensible answers or charts. Something like this:
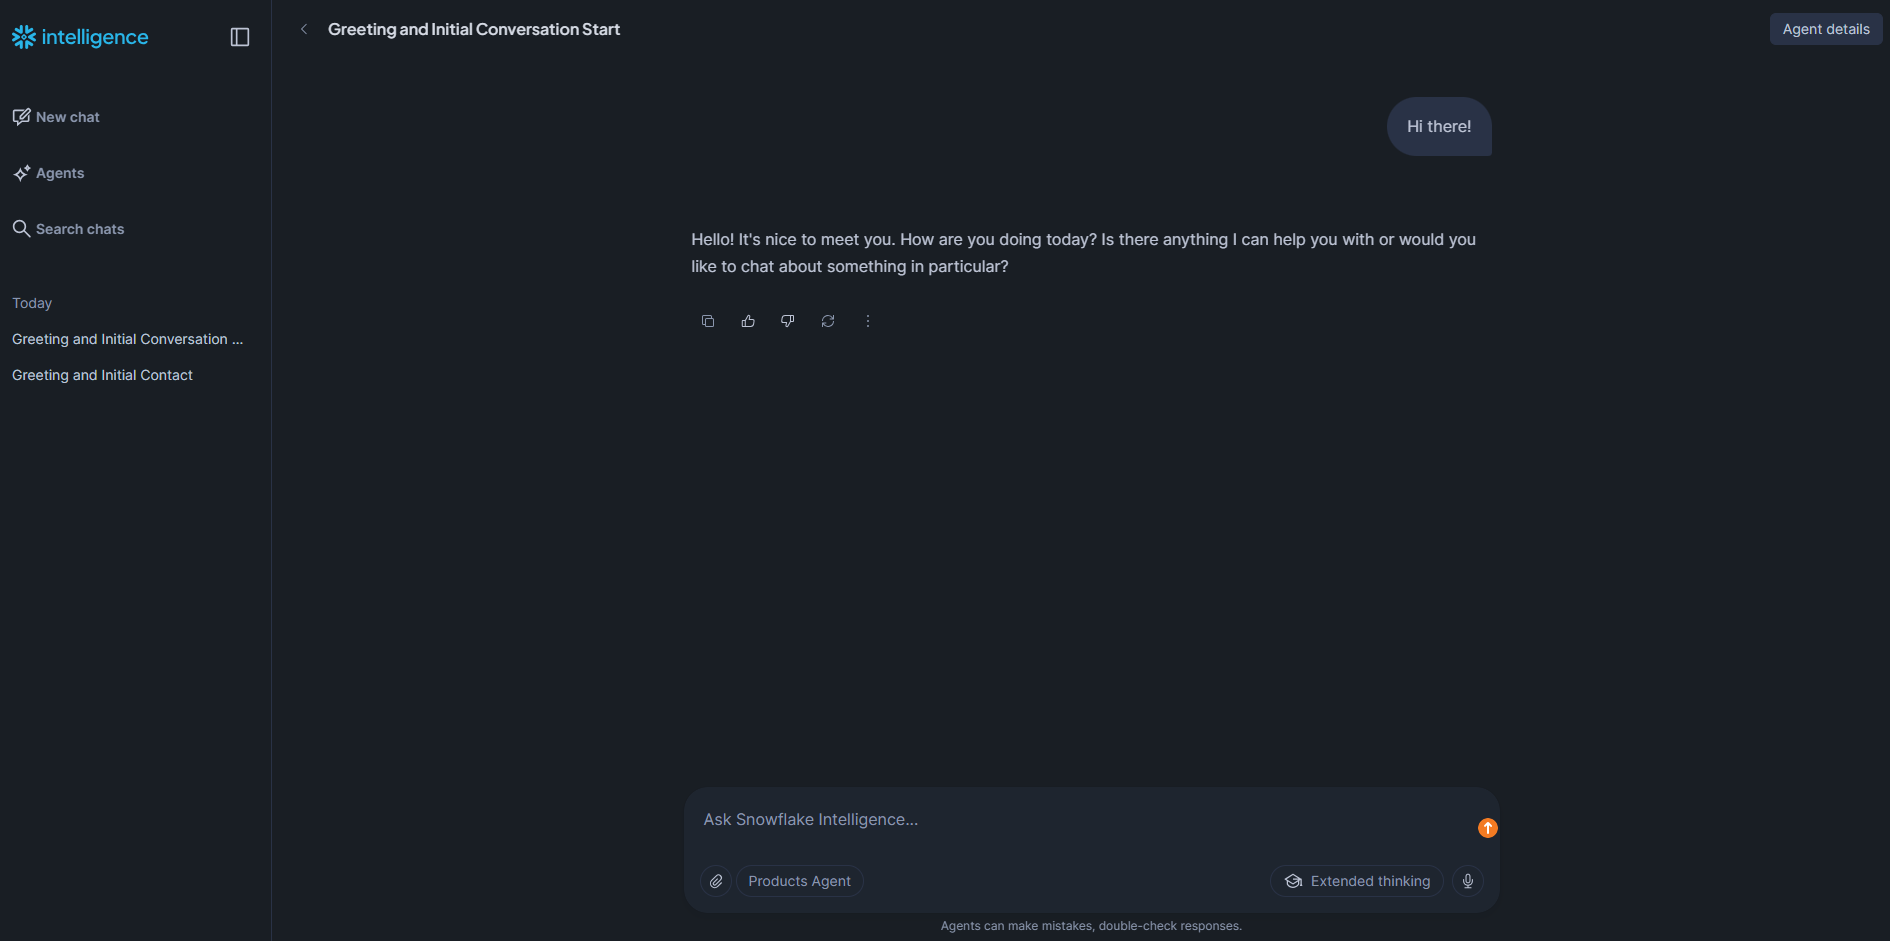
Figure 23: Testing an agent’s response in the Snowflake Snowsight chat interface—Snowflake Intelligence
If something is wrong, check the following:
- User has the correct role and Snowflake virtual warehouse (Snowflake Intelligence uses the user’s default role and warehouse by default)
- Agent has the correct tool configurations (semantic view, search service)
- Permission errors in the agent’s log (use SHOW AGENTS and DESCRIBE AGENT to inspect)
- Account usage or logs for any Cortex AI errors
If you encounter any issues, Snowflake documentation and community forums are good resources. But in many cases, it’s just a matter of adjusting permissions or tool settings. Once it’s all OK, you can easily start chatting with the agent and getting answers from your data in the cloud.
Example: Identifying top-performing products using the Snowflake Intelligence
Now, let’s walk through a complete example of building an agent that answers questions about product performance. We’ll outline thorough steps and objects you’ll set up.
Phase A—Prerequisites and global setup
Assume you’ve completed Steps 1 to 5 from the configuration guide above. If your region doesn’t natively support your preferred model, enable cross-region inference as shown in Step 4.
Phase B—Objects, data and staging
Step 1—Create role, users, database, schema and warehouse
First, we need to build the sandbox. Let’s start by creating the administrative backbone: Snowflake roles, users and the containers for our data. Using a dedicated role like product_analyst helps keep your permissions clean and follows the principle of least privilege.
USE ROLE ACCOUNTADMIN;

CREATE ROLE IF NOT EXISTS product_analyst;

CREATE USER IF NOT EXISTS analyst_user PASSWORD='Password@123!' DEFAULT_ROLE=product_analyst;

GRANT ROLE product_analyst TO USER analyst_user;
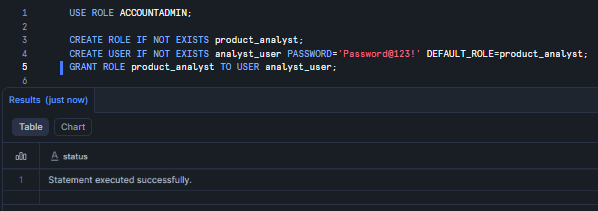
Figure 24: Provisioning the product_analyst role and user—Snowflake Intelligence
Next, set up the database and schema. Always keep the analytics layer separate so things don’t get messy later.
CREATE DATABASE IF NOT EXISTS sales_db;

CREATE SCHEMA IF NOT EXISTS sales_db.analytics;

USE SCHEMA sales_db.analytics;
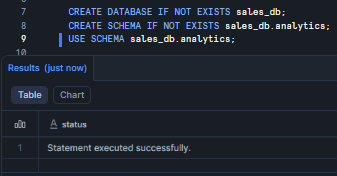
Figure 25: Defining the sales database and schema—Snowflake Intelligence
Finally, we need some computing power. A MEDIUM Snowflake virtual warehouse handles these operations easily, and the auto-suspend feature keeps your credits from draining.
CREATE WAREHOUSE IF NOT EXISTS analytics_wh

 WAREHOUSE_SIZE = 'MEDIUM'

 AUTO_SUSPEND = 300

 AUTO_RESUME = TRUE;
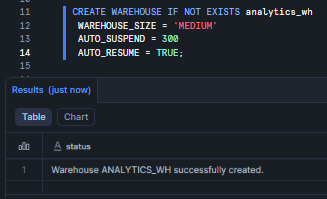
Figure 26: Creating the analytics Snowflake virtual warehouse—Snowflake Intelligence
Step 2—Create tables and load sample data
A database is just an empty shell without data. Let’s create a products table to house our catalog. Notice that we are just using standard data types to help keep it simple, which makes the LLM’s job easier.
CREATE OR REPLACE TABLE products (

  "product_id"   INT,

  "product_name" STRING,

  "category"     STRING,

  "price"   DECIMAL(10,2)

);
INSERT INTO products ("product_id", "product_name", "category", "price") VALUES

  (1,  'Apple iPhone 16',              'Phones',     799.99),

  (2,  'Apple iPhone 16 Pro Max',      'Phones',    1199.99),

  (3,  'Samsung Galaxy S25 Ultra',     'Phones',    1299.99),

  (4,  'Samsung Galaxy A16 5G',        'Phones',     199.99),

  (5,  'Google Pixel 10 Pro',          'Phones',     999.99),

  (6,  'Apple iPhone 17',              'Phones',     829.99),

  (7,  'Samsung Galaxy S25',           'Phones',     799.99),

  (8,  'Apple AirPods Pro 3',          'Earphones',  249.99),

  (9,  'Sony WF-1000XM5',              'Earphones',  299.99),

  (10, 'Bose Comfort Ultra Earbuds',   'Earphones',  249.99),

  (11, 'Samsung Galaxy Buds 3 Pro',    'Earphones',  229.99),

  (12, 'Google Pixel Buds Pro 2',      'Earphones',  229.99),

  (13, 'Apple AirPods 4',              'Earphones',  129.99),

  (14, 'Anker Soundcore Liberty 4 NC','Earphones',   99.99),

  (15, 'Nothing Ear (2025)',           'Earphones',  149.99);
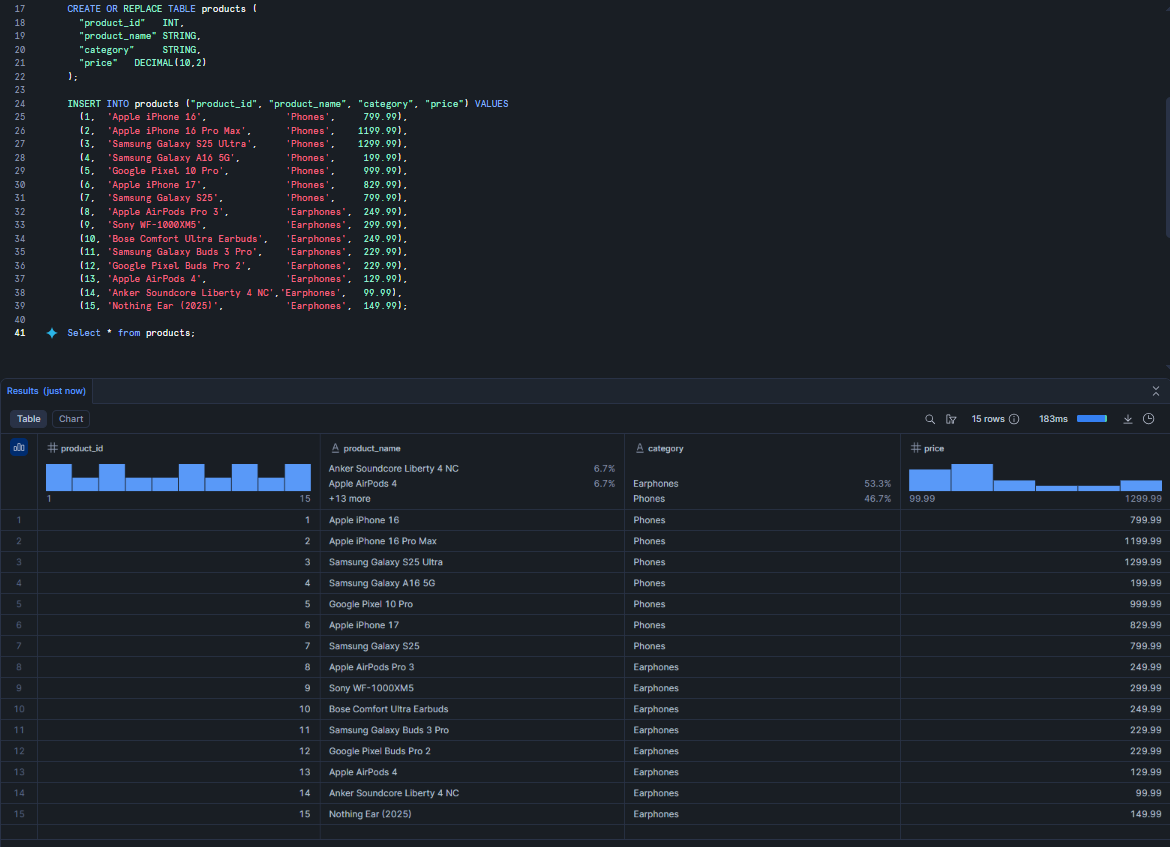
Figure 27: Populating the products table—Snowflake Intelligence
Now, let’s add some transaction history. This sales table tracks what was sold, when, and for how much.
CREATE OR REPLACE TABLE sales (

  "sale_id"      INT,

  "product_id"   INT,

  "sale_date"    DATE,

  "quantity"     INT,

  "total_amount" DECIMAL(10,2)

);
INSERT INTO sales ("sale_id", "product_id", "sale_date", "quantity", "total_amount") VALUES

  (1,  1,  '2026-01-10',  1,   799.99),

  (2,  2,  '2026-01-12',  1,  1199.99),

  (3,  5,  '2026-01-15',  2,  1999.98),

  (4,  8,  '2026-01-18',  3,   749.97),

  (5,  4,  '2026-01-20',  1,   199.99),

  (6, 11,  '2026-01-22',  4,   919.96),

  (7,  2,  '2026-01-25',  1,  1199.99),

  (8, 13,  '2026-01-28',  5,   649.95),

  (9,  9,  '2026-02-02',  2,   599.98),

  (10,14, '2026-02-05', 10,   999.90);
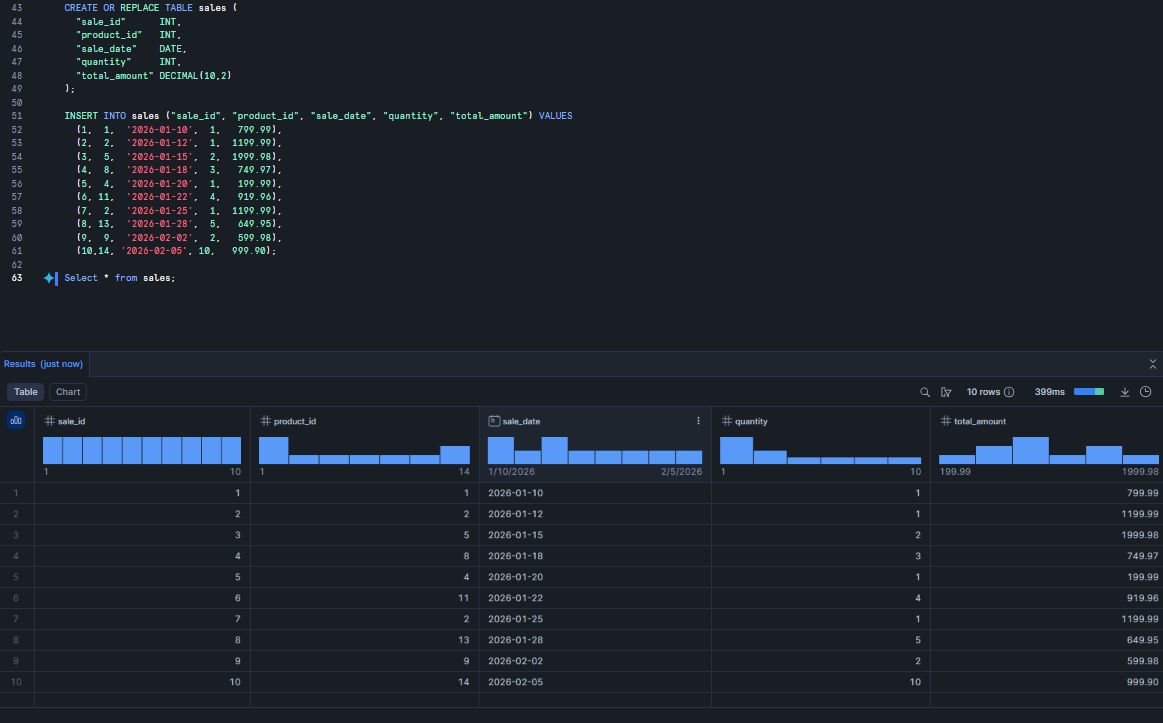
Figure 28: Adding transaction records to the sales table—Snowflake Intelligence
Step 3—Create Snowflake internal stage and upload Snowflake semantic model YAML file
Snowflake Intelligence needs a map to understand your SQL schema. This map is a YAML file called a semantic model. First, let’s create a Snowflake stage, which is essentially a folder inside Snowflake, to hold that file.
CREATE OR REPLACE STAGE semantic_models;
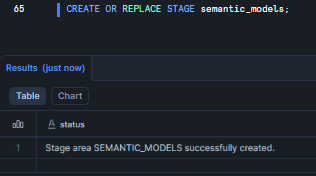
Figure 29: Creating the semantic_models Snowflake internal stage—Snowflake Intelligence
Once you have created your Snowflake Stage, upload the following YAML file to that Snowflake stage. You can either use the Snowflake Snowsight UI or the PUT command. In this guide, we will upload it via Snowsight. To do so, navigate to Catalog > Database Explorer in the sidebar, select your database and schema, then click on Stages and select your Snowflake stage. Click the + Files button to upload files.
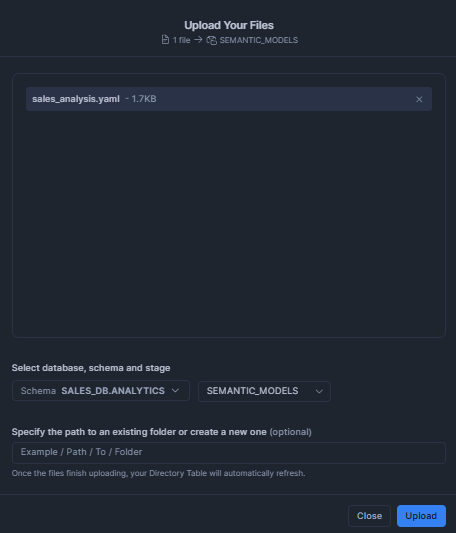
Figure 30: Uploading the YAML file via Snowflake Snowsight UI—Snowflake Intelligence
Here’s what your Snowflake semantic model YAML should look like:
name: SALES_ANALYSIS

description: Semantic model for product sales analysis

tables:

  - name: PRODUCTS

    description: Product catalog with pricing

    base_table:

      database: SALES_DB

      schema: ANALYTICS

      table: PRODUCTS

    primary_key:

      columns:

        - PRODUCT_ID

    dimensions:

      - name: PRODUCT_NAME

        synonyms:

          - product

          - item

        description: Name of the product

        expr: PRODUCT_NAME

        data_type: STRING

      - name: CATEGORY

        synonyms:

          - product category

          - type

        description: Product category

        expr: CATEGORY

        data_type: STRING

  - name: SALES

    description: Sales transactions

    base_table:

      database: SALES_DB

      schema: ANALYTICS

      table: SALES

    primary_key:

      columns:

        - SALE_ID

    dimensions:

      - name: SALE_DATE

        description: Date of sale

        expr: SALE_DATE

        data_type: DATE

    metrics:

      - name: TOTAL_REVENUE

        description: Total sales revenue

        expr: SUM(TOTAL_AMOUNT)

      - name: UNITS_SOLD

        description: Total units sold

        expr: SUM(QUANTITY)

relationships:

  - name: SALES_TO_PRODUCTS

    left_table: SALES

    left_column: PRODUCT_ID

    right_table: PRODUCTS

    right_column: PRODUCT_ID
Save the above YAML file as sales_analysis.yaml on your PC. Once that’s done, navigate to the upload interface, select the Database, schema, and stage that you created earlier, upload that YAML file to that Snowflake stage, and click upload.

Figure 31: Uploading the YAML file via Snowflake Snowsight—Snowflake Intelligence
OR
Use the PUT command from SnowSQL:
PUT file://sales_analysis.yaml @SEMANTIC_MODELS AUTO_COMPRESS=TRUE;
Phase C—Snowflake Cortex setup (semantic layer, search and agent)
Step 1—Configure the Snowflake Cortex Search feature (optional for unstructured data)
Now we turn that YAML file into a living “Semantic View.” This is a schema-level object that keeps your business logic inside the database where it belongs.
You have two options to create the semantic view:
Option 1—Create from YAML file
Create the semantic view from the YAML:
CALL SYSTEM$CREATE_SEMANTIC_VIEW_FROM_YAML(

  'sales_db.analytics',

  GET_PRESIGNED_URL(@semantic_models, 'sales_analysis.yaml'),

  FALSE

);
OR
Option 2—Create directly in SQL
If you prefer keeping everything in a single SQL script, you can define the view directly. It does the same thing: it maps metrics and dimensions so the LLM doesn’t have to guess what columns mean.
CREATE OR REPLACE SEMANTIC VIEW sales_analysis

TABLES (

  products AS sales_db.analytics.products PRIMARY KEY ("product_id"),

  sales AS sales_db.analytics.sales PRIMARY KEY ("sale_id")

)

DIMENSIONS (

  products.product_name AS "product_name",

  products.category AS "category",

  sales.sale_date AS "sale_date"

)

METRICS (

  sales.total_revenue AS SUM("total_amount"),

  sales.units_sold AS SUM("quantity")

)

COMMENT = 'Semantic view for analyzing phone and earphone sales data'
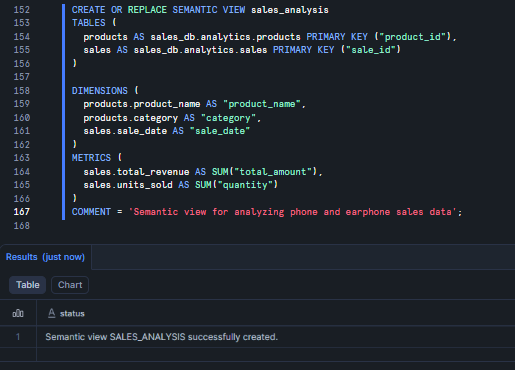
Figure 32: Generating the sales_analysis semantic view—Snowflake Intelligence
Both approaches create a semantic view, which is a schema-level object that stores business concepts directly in the database. Snowflake semantic views address the gap between how business users describe data and how it’s stored in database schemas. They’re metadata objects that improve LLM accuracy by combining reasoning with rule-based definitions.
Step 2—Configure Snowflake Cortex Search (Optional for Unstructured Data)
If you have product documentation or reviews in unstructured format, you can set up Snowflake Cortex Search to enable semantic search over text data. This is useful when you want to search through product reviews, descriptions, or support documentation.
First, create a table for unstructured content:
CREATE OR REPLACE TABLE product_reviews (

  review_id INT,

  product_id INT,

  review_text STRING,

  review_date DATE

);
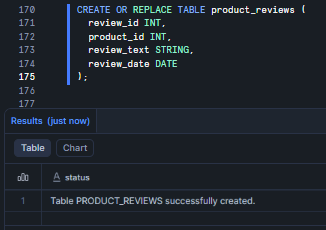
Figure 33: Creating the product_reviews table—Snowflake Intelligence
ALTER TABLE product_reviews SET CHANGE_TRACKING = TRUE;
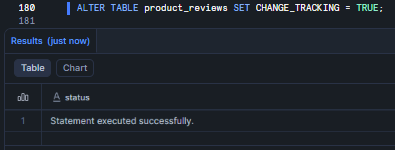
Figure 34: Enabling change tracking for incremental search updates—Snowflake Intelligence
Note: Change tracking must be enabled with non-zero time travel retention on all underlying objects to support incremental refreshes.
Let’s throw in some sample data. Here, we’ve added a mix of praise and complaints to test the agent’s reasoning later.
INSERT INTO product_reviews (review_id, product_id, review_text, review_date) VALUES

  (1, 1, 'Amazing phone with great camera quality and battery life. Highly recommended!', '2026-01-15'),

  (2, 2, 'Premium device but expensive. Display is stunning and performance is top-notch.', '2026-01-18'),

  (3, 8, 'Best noise cancellation I have experienced. Comfortable for long listening sessions.', '2026-01-20'),

  (4, 9, 'Sound quality is exceptional. Battery life could be better but overall excellent.', '2026-01-22'),

  (5, 14, 'Great value for money. Sound quality rivals premium brands at half the price.', '2026-02-08');

Figure 35: Inserting sample review records—Snowflake Intelligence
Now let’s provision the actual Snowflake Cortex Search service.
CREATE OR REPLACE CORTEX SEARCH SERVICE product_review_search

  ON review_text

  ATTRIBUTES review_id, product_id, review_date

  WAREHOUSE = analytics_wh

  TARGET_LAG = '1 hour'

  AS (

    SELECT

      review_id,

      product_id,

      review_text,

      review_date

    FROM product_reviews

  );
- ON review_text: Specifies the column to index for full-text search.
- ATTRIBUTES: Lists additional columns you want to return in results or filter on when querying.
- WAREHOUSE: The Snowflake virtual warehouse used for running the source query, building the search index, and keeping it refreshed.
- TARGET_LAG: Defines how fresh the search results need to be. A value of 1 hour means the service will check for updates approximately once per hour.
Snowflake Cortex Search service uses a combination of vector embeddings and keyword matching. It uses the snowflake-arctic-embed-m-v1.5 embedding model by default, though you can specify a different model using the EMBEDDING_MODEL parameter.
Here are available Snowflake AI models:
- snowflake-arctic-embed-m-v1.5 (default, 768 dimensions)
- snowflake-arctic-embed-l-v2.0 (1024 dimensions, higher quality)
- snowflake-arctic-embed-s (384 dimensions, faster)
- Other supported models, depending on your region
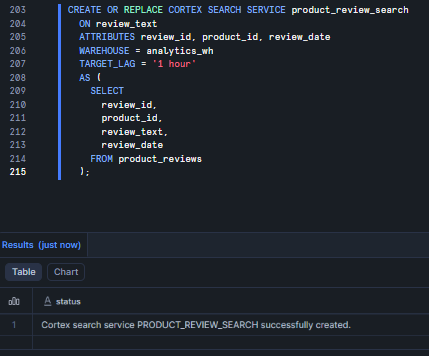
Figure 36: Provisioning the Snowflake Cortex Search service—Snowflake Intelligence
Step 3—Create the Snowflake Cortex agent
The Agent is the “brain” that orchestrates everything. It decides whether a user’s question requires a SQL query (via Analyst) or a text search (via Search).
CREATE AGENT sales_agent
  COMMENT = 'Agent for analyzing product sales data'
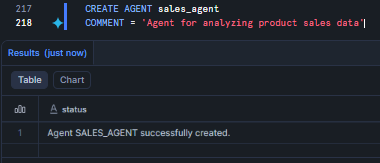
Figure 37: Defining the sales_agent object—Snowflake Intelligence
The rest of the configuration happens in the Snowflake Snowsight UI. Navigate to AI & ML > Agents > sales_agent to start plugging in your tools.
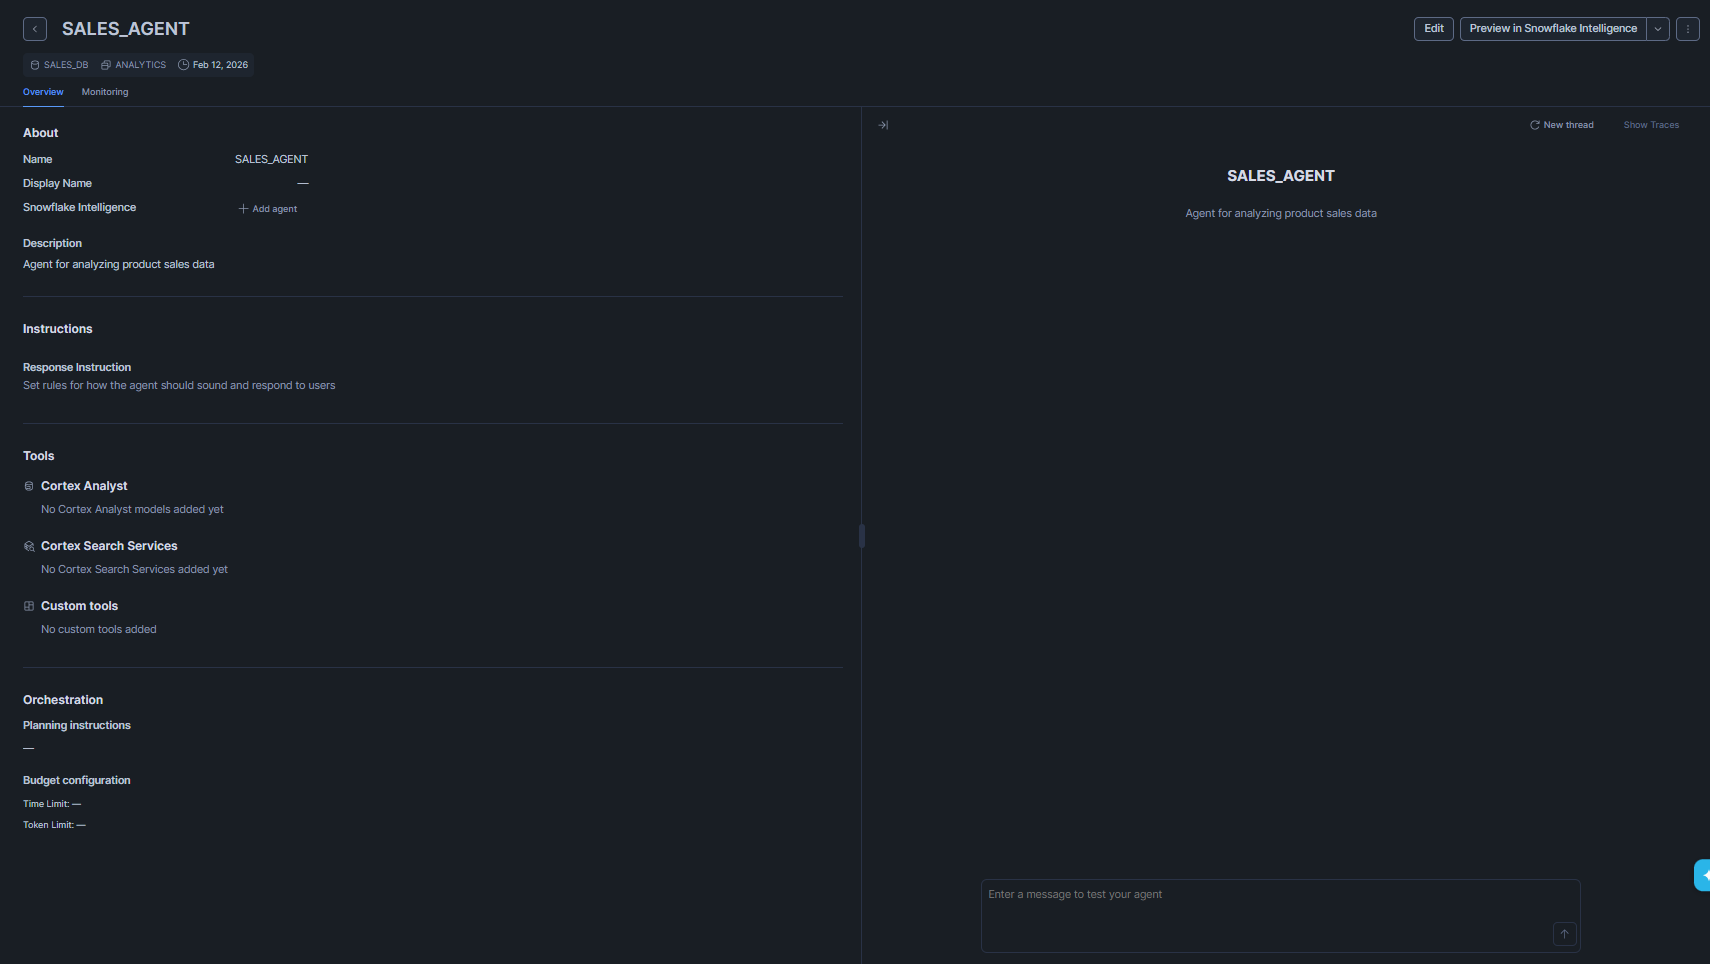
Figure 38: Opening the agent configuration in Snowflake Snowsight—Snowflake Intelligence
Click Edit in the top-right corner. Then navigate to the Tools tab and add Cortex Analyst and Cortex Search, which you configured earlier.
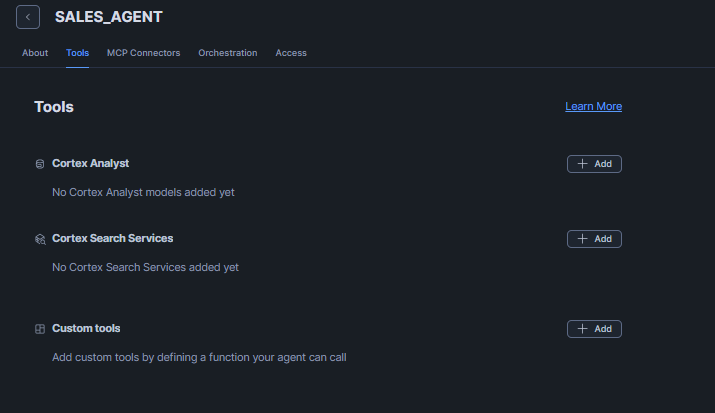
Figure 39: Accessing the agent Tools menu—Snowflake Intelligence
Adding Snowflake Cortex Analyst
For Cortex Analyst, click the +Add button and select the database and schema you configured previously. Once selected, you will see the sales_analysis semantic view that you created earlier, and choose it from the dropdown.
Next, provide a name for the tool, such as “Sales_Analyst.” For the description, you can either click “Generate with Cortex” to auto-generate one or write a description manually.
After that, go to the Warehouse section below. Click Custom and select your preferred Snowflake virtual warehouse. For this guide, we will use “analytics_wh.” Finally, set the Query Timeout to around 60 seconds, and then click Add.
TL;DR:
- Name: “Sales_Analyst”
- Semantic View: sales_analysis
- Warehouse: analytics_wh
- Query Timeout: 60 seconds
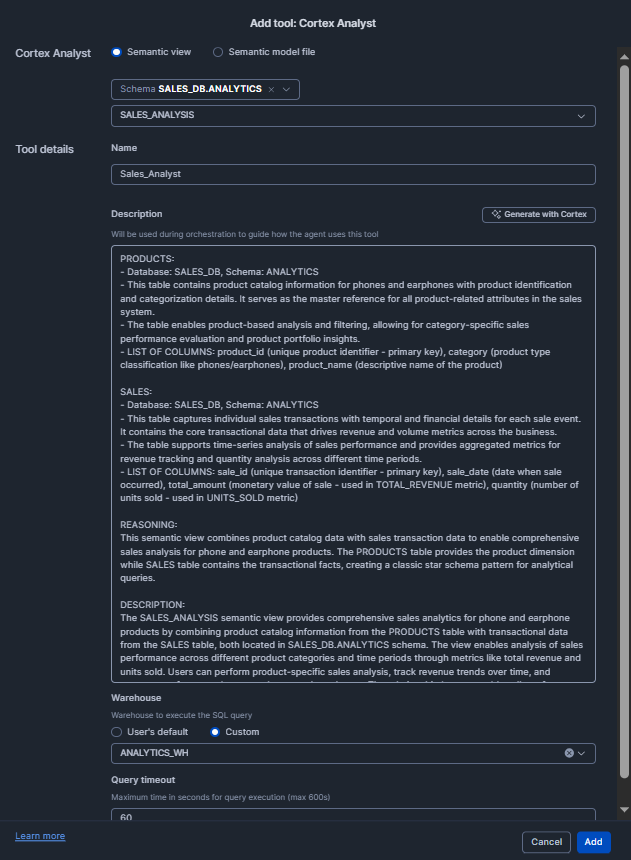
Figure 40: Configuring the Sales_Analyst tool settings— Snowflake Intelligence
Adding Snowflake Cortex Search
Now For Cortex Search, if you have configured Cortex Search do the same for that as well. Earlier, we configured Cortex Search for Product Reviews, so let’s set that up.
Click the +Add button and select the database and schema you configured previously. Once selected, you will see product_review_search, which you created earlier, choose it from the dropdown.
Next, provide a name for the tool, such as “Product_Reviews_Search.” Then, in the ID column, add Review_id, and in the Title column, add Review_text (or adjust according to your preference). Once completed, click Add.
TL;DR:
- Name: “Product_Reviews_Search”
- Search: product_review_search
- ID: Review_id
- Title: Review_text
- Query Timeout: 60 seconds

Figure 41: Adding the Product_Reviews_Search tool—Snowflake Intelligence
Once everything is configured, your Tools section should look like this:
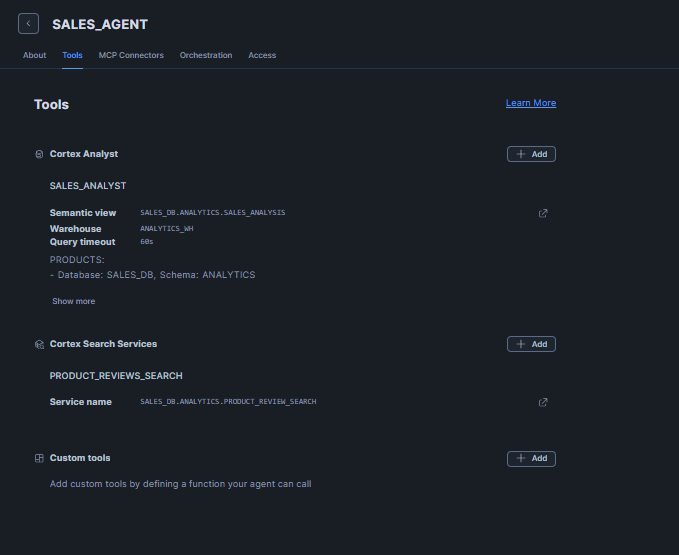
Figure 42: Reviewing the completed tool configuration— Snowflake Intelligence
Finally, click Save to complete the configuration. You’re done.
Phase D—Verify, run and sample queries
Step 1—Navigate to the Snowflake Intelligence interface
Everything is wired up. Time to see if it works. Head over to AI & ML > Snowflake Intelligence (or just hit ai.snowflake.com).
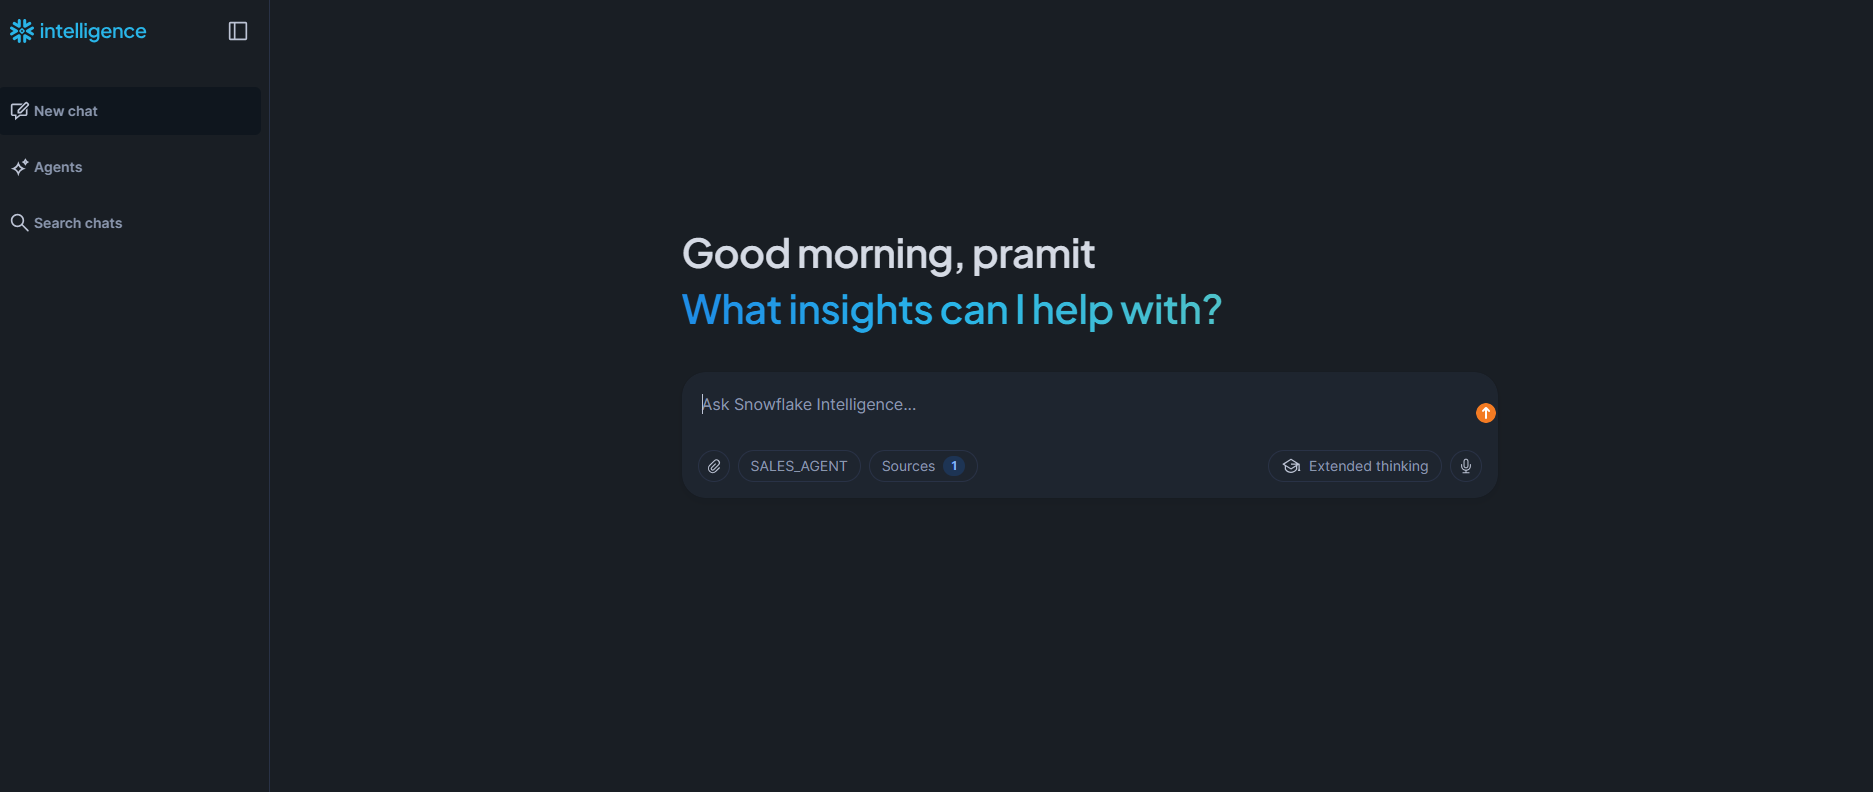
Figure 43: Accessing the Snowflake Intelligence interface
Step 2—Enter natural language query
Try out these questions:
Question 1: What are the top 5 products by revenue?
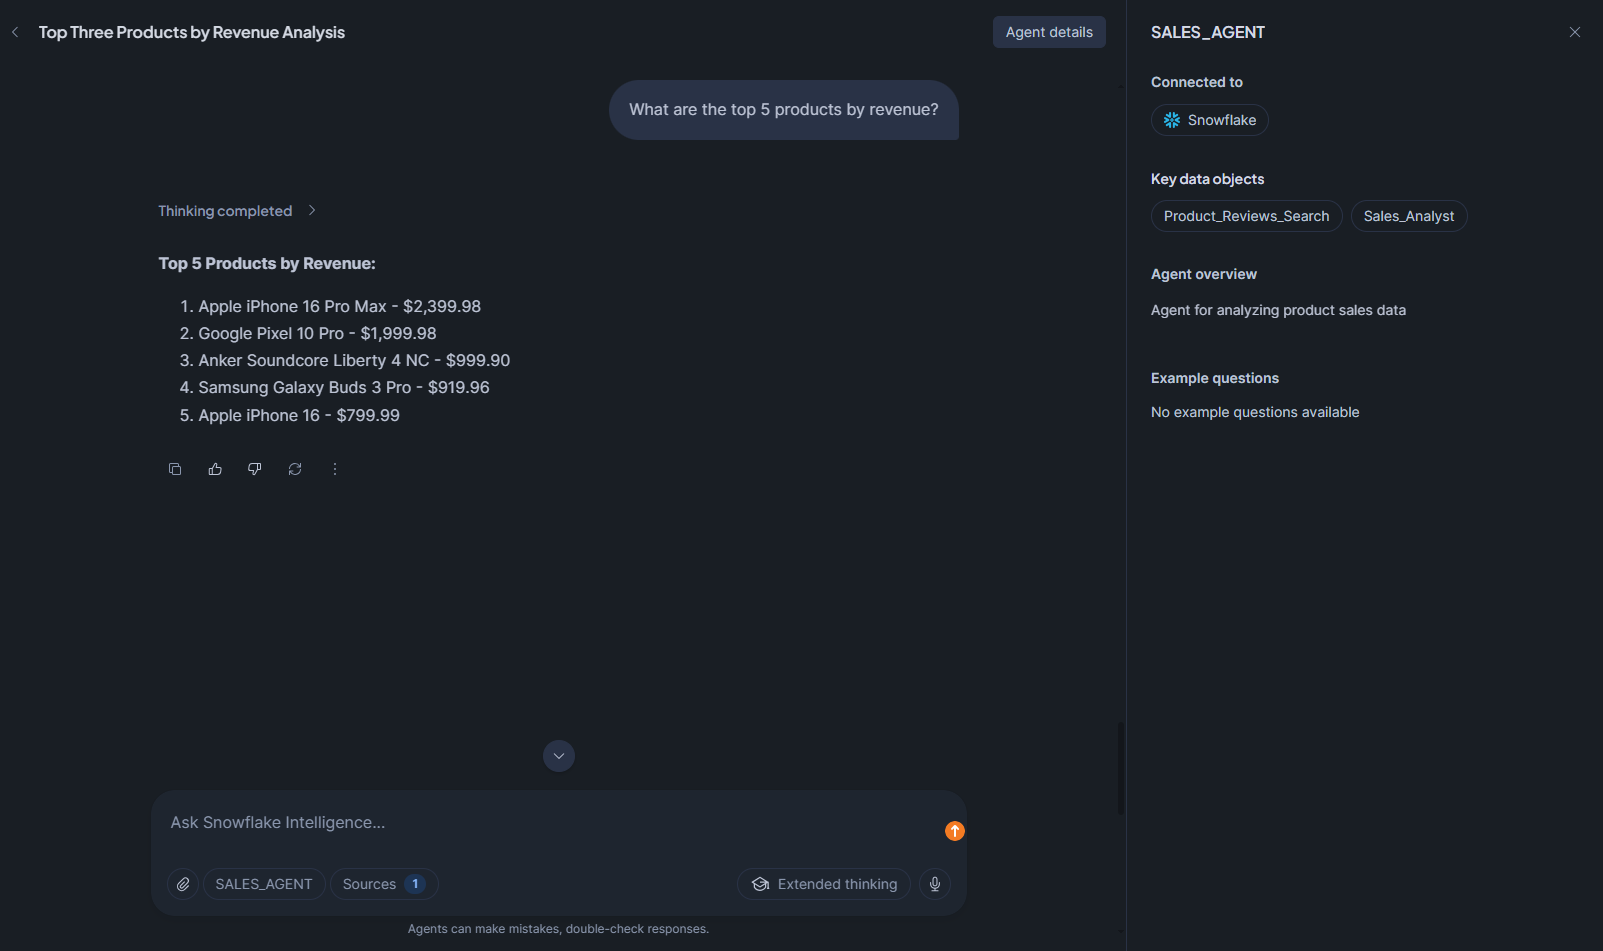
Figure 44: Querying top products by revenue— Snowflake Intelligence
Question 2: Show me sales by category
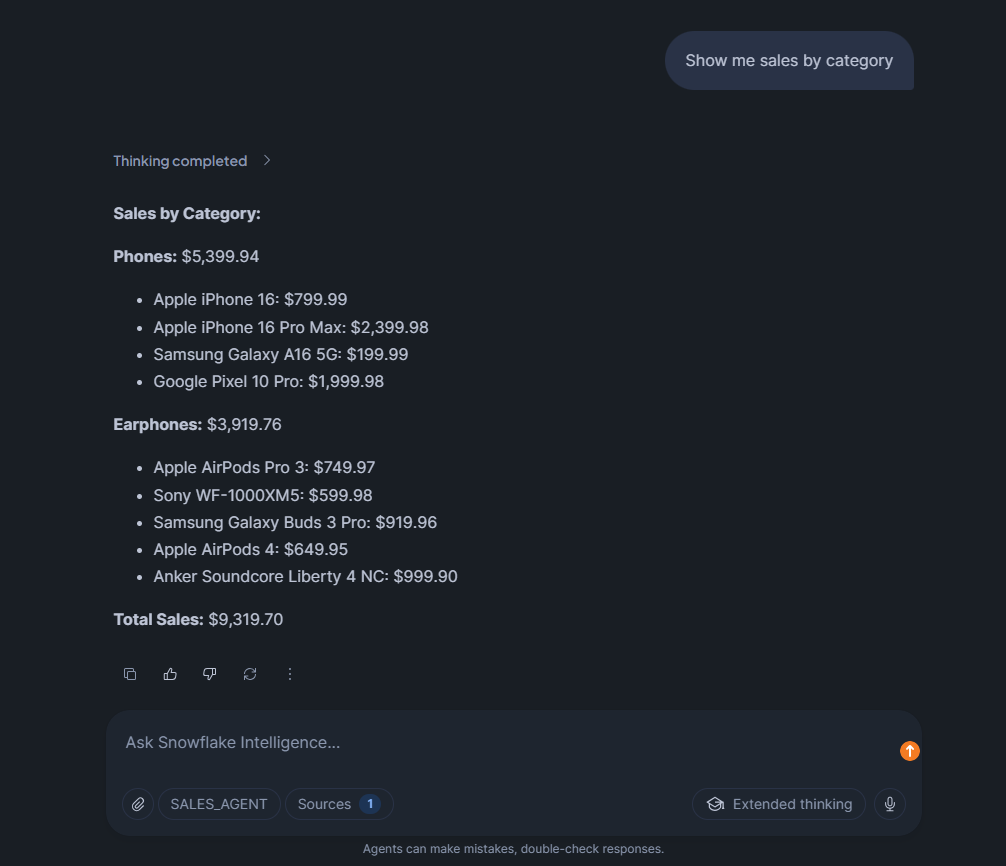
Figure 45: Querying category-level sales— Snowflake Intelligence
Question 3: How many units of Apple iPhone 16 were sold?
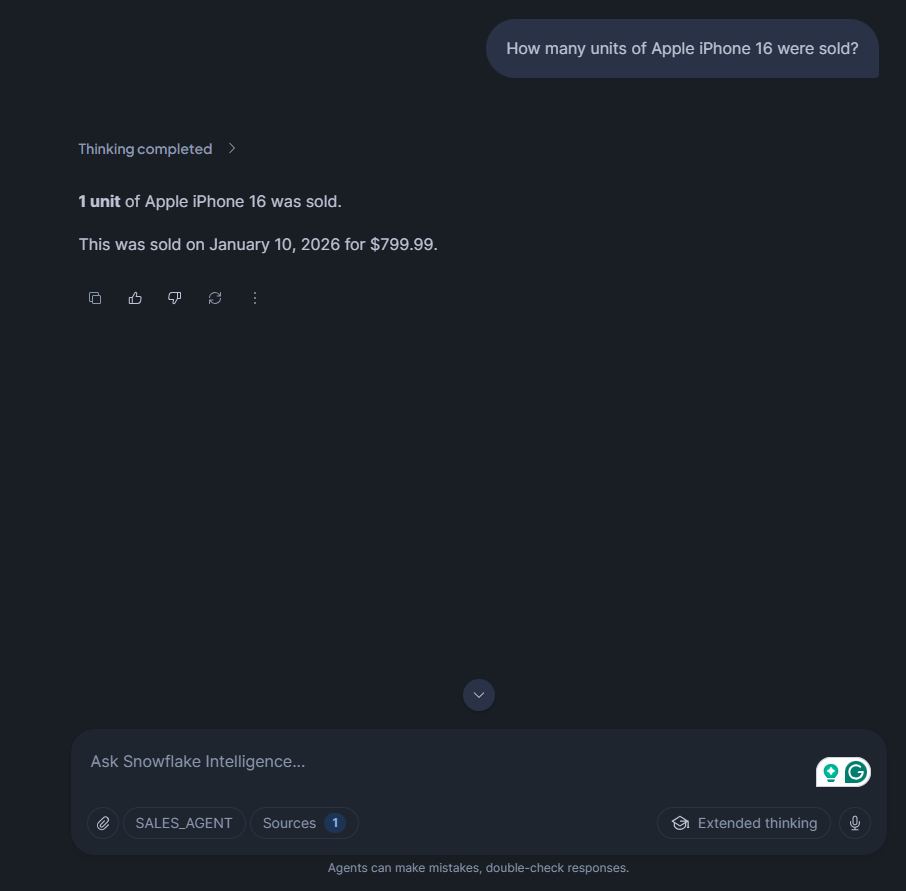
Figure 46: Asking for specific product sales volume— Snowflake Intelligence
Question 4: Top performing products by revenue
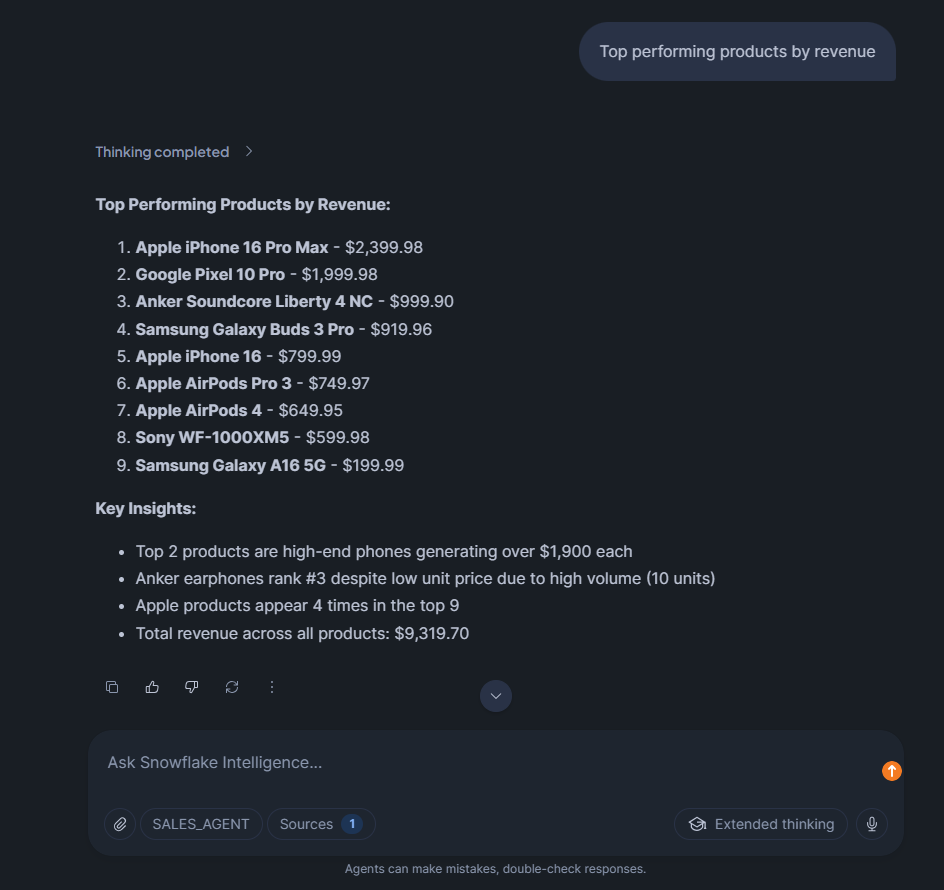
Figure 47: Ranking revenue performance— Snowflake Intelligence
Question 5: What are customers saying about the Sony WF-1000XM5 in their reviews?
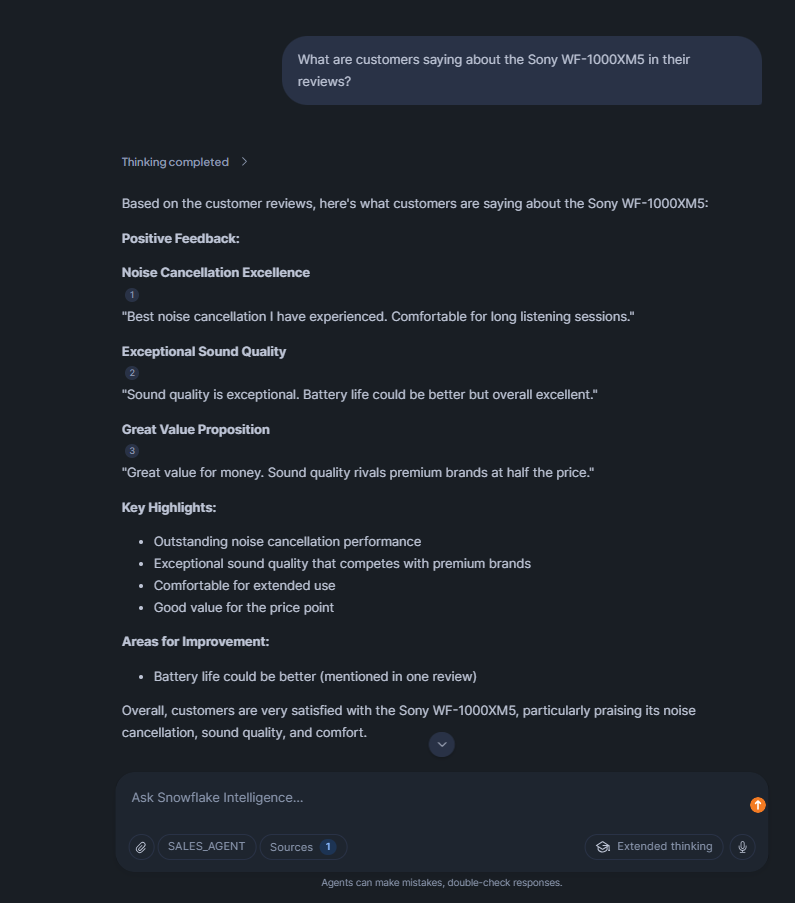
Figure 48: Analyzing customer sentiment through search—Snowflake Intelligence
And the best part? You can even ask follow-up questions. The agent maintains conversation context, so it understands these refer to the previous query.
Limitations of Snowflake Intelligence
Snowflake Intelligence is seriously powerful, but it has some key limitations you should be aware of.
1) Token and context window limitations
Each LLM has a fixed context window. Claude 3.5 Sonnet supports 200k tokens, but if you use 195k tokens for input, you can only generate 5k tokens of output (the total can’t exceed 200k).
For semantic models, a good rule of thumb is to keep it under 50-100 columns across all tables. Go beyond that, and you’ll probably run into latency issues or see a decline in quality. That’s because the whole semantic model has to be loaded into the LLM for every query.
2) Unpredictable costs
Consumption-based pricing sounds flexible until you get a surprise bill. Run one bad query using AI_COMPLETE on millions of rows, and you’ll be shocked at how fast your credits disappear. You can’t really set a hard limit to prevent costs from getting out of hand, so you just have to monitor them and hope for the best.
On top of that, cross-region inference also comes with data transfer charges that may not be clear at first. If your account is in Europe but your preferred model is in AWS US, every query will incur egress fees.
3) Snowflake-only data access
Snowflake Intelligence is confined to data within the Snowflake environment. It can’t directly query external databases or data sources outside Snowflake without first ingesting that data.
4) Limitations in query handling
Snowflake Cortex Analyst works best with well-defined semantic models. If your data model is messy, with issues like tables missing primary keys, inconsistent naming, or complex, unnormalized schemas, the quality of the generated SQL will suffer. The agent can’t be expected to fix poor data architecture on its own.
Multi-step reasoning has its limits. If you ask a question that needs more than 2-3 steps to answer, you will probably get an incomplete or incorrect response. Agents can break down tasks and use the right tools, but they are not good at complex planning that involves backtracking or testing ideas.
5) Language and document processing limitations
Snowflake Cortex Search’s embedding models are optimized for English. Non-English text gets lower-quality semantic search results. You can still search it, but relevance scores won’t be as accurate.
Document processing has size limits. Images must be smaller than 8000 * 8000 pixels. Text chunks are recommended to stay under 512 tokens for best retrieval quality. Larger documents need to be split before indexing.
6) Region-specific and integration limits
Not all features are available in all regions. Some models require cross-region inference, which adds latency and cost. If you’re in a region with limited Cortex support, you might not have the best experience.
Integration with external systems relies on stored procedures and webhooks. There’s no native connector for tools like Salesforce or HubSpot, so you’ll need to write custom code to connect them.
Snowflake Intelligence can’t directly access data behind authentication walls like private Google Docs or password-protected file shares. You have to copy that data into Snowflake stages first.
7) No separate logging for agent-generated queries
There’s no built-in way to distinguish queries generated by agents from manual SQL queries in query history. You must filter by Snowflake virtual warehouse or Snowflake role and plan your environment accordingly for tracking.
8) Accuracy depends on Snowflake semantic model quality
If semantic models are poorly defined or incomplete, the agent will generate incorrect SQL. The system is only as good as the business logic you encode.
9) Rate limiting and quotas
The Cortex REST API has rate limits: tokens per minute (TPM) and requests per minute (RPM). If you hit these limits, you get a 429 error and have to retry. High-throughput applications need to implement backoff logic.
Query timeouts can kill long-running SQL generation. If Cortex Analyst generates a query that takes more than your configured timeout (default 60 seconds), it fails without returning partial results.
Conclusion
Snowflake Intelligence is a really powerful feature that Snowflake released this year. It brings state-of-the-art AI agents to your data warehouse, with LLM-powered reasoning, visualization, and action tools all in one place. The best part’s that it stays within the secure Snowflake environment, so your data never leaves and still follows your governance rules.
Now, engineers and developers can easily build AI features on top of their data by setting up Snowflake semantic models and agent tools and letting the Snowflake Intelligence feature handle the rest. It’s not magic, of course. You still need to set up your semantic models, create data indexes and monitor performance and costs. Once everything’s in place, the Snowflake Intelligence feature works like a super smart data assistant. You can chat with it, and it comes up with SQL on the fly, digs up hidden details in documents and even kicks off workflows with just your voice or text. It’s basically a layer above your data cloud, turning your questions into answers in an instant.
In this article, we’ve covered:
- What is Snowflake Intelligence?
- Key features of Snowflake Intelligence
- Cost breakdown of the Snowflake Intelligence feature
- Architecture overview of the Snowflake Intelligence
- Step-by-step guide to configuring and running the Snowflake Intelligence feature
- Example: Identifying top-performing products using the Snowflake Intelligence feature
- Limitations of the Snowflake Intelligence platform
… and so much more!
Want to learn more? Reach out for a chat
FAQ
What is Snowflake Intelligence?
Snowflake Intelligence is an agentic AI platform that enables natural language interaction with enterprise data stored in Snowflake. It uses intelligent agents powered by Cortex AI to answer questions, generate insights, and create visualizations from both structured and unstructured data.
When was Snowflake Intelligence released?
Snowflake Intelligence entered public preview in mid-2025 and became generally available on November 4, 2025.
How does Snowflake Intelligence work?
When you ask a question, Snowflake starts a Cortex Agent. The agent uses a large language model to figure out what you need and plan a workflow. If you have structured data, it uses Cortex Analyst to turn your question into SQL, based on your semantic models. For unstructured data, it uses Cortex Search to find relevant text. It may also use AI to complete or embed information. The results are combined and formatted into a natural-sounding answer, which may include optional charts. All data processing happens on your Snowflake cluster, and each step follows your access controls.
What are the prerequisites for using Snowflake Intelligence?
You need a Snowflake account on a supported edition (standard or above) with an active Snowflake Snowsight interface. The ACCOUNTADMIN role is required to create the Snowflake Intelligence object. You should have at least one Snowflake virtual warehouse ready, your data loaded (structured tables and any docs), and optionally semantic models or views prepared. Also, configure any Snowflake roles/privileges: grant SNOWFLAKE.CORTEX_USER to users who will run queries. If using external networks, set up AWS/Azure PrivateLink for secure service connectivity.
How much does Snowflake Intelligence cost and how to monitor expenses?
Costs come from Snowflake Cortex Analyst (6.7 credits per 100 requests), Snowflake virtual warehouse usage (1-512 credits per hour based on size), Snowflake Cortex Search (8 credits per hour), LLM inference, and potential cross-region fees.
What security and data governance features does Snowflake Intelligence offer?
Snowflake Intelligence respects all existing Snowflake RBAC controls, row-level security policies, and data masking rules. Queries are logged and auditable. Data never leaves Snowflake’s security perimeter. You can grant or revoke access at the role level and control which agents users can interact with.
What types of questions can Snowflake Intelligence answer?
Snowflake Intelligence can answer questions about structured data in tables (sales metrics, customer data, operational KPIs), unstructured content in documents (contracts, support tickets, research reports), and combined questions requiring both data types. It can generate visualizations and execute custom business logic through tools.
How does Snowflake Intelligence differ from ChatGPT or other general LLMs?
Snowflake Intelligence knows your business data and terminology through semantic models, respects your access controls and governance policies, keeps all data within your Snowflake environment, generates and executes SQL against live data, and provides audit trails. General LLMs have no context about your business and can’t access your data securely.
What are the limitations of Snowflake Intelligence?
Snowflake Intelligence has some major limitations:
- Token and context window constraints for LLMs and semantic models.
- Unpredictable costs based on usage.
- Data must stay in Snowflake; external database querying isn’t allowed.
- Limited capabilities for complex multi-step reasoning.
- Weaker support for non-English languages.
- Region-specific model availability.
- Rate limits on API calls.
Does Snowflake Intelligence require technical training?
End users can ask questions using natural language, without needing to know SQL or have technical expertise. To get Snowflake Intelligence running, though, data engineers or admins have some setup work to do. This includes creating semantic models, configuring agents, setting up Cortex Search services, and managing access controls.